


|
|
|
Buck's turbo diesel swap |
Post Reply 
|
Page 123 30> |
| Author | |
Daniel_Buck 
Member 
Joined: 01 Apr. 2012 Location: Gilroy Status: Offline Points: 1200 |
 Post Options Post Options
") Thanks(0) Thanks(0)
 Quote Reply Quote Reply
 Topic: Buck's turbo diesel swap Topic: Buck's turbo diesel swapPosted: 30 Apr. 2013 at 12:58am |
|
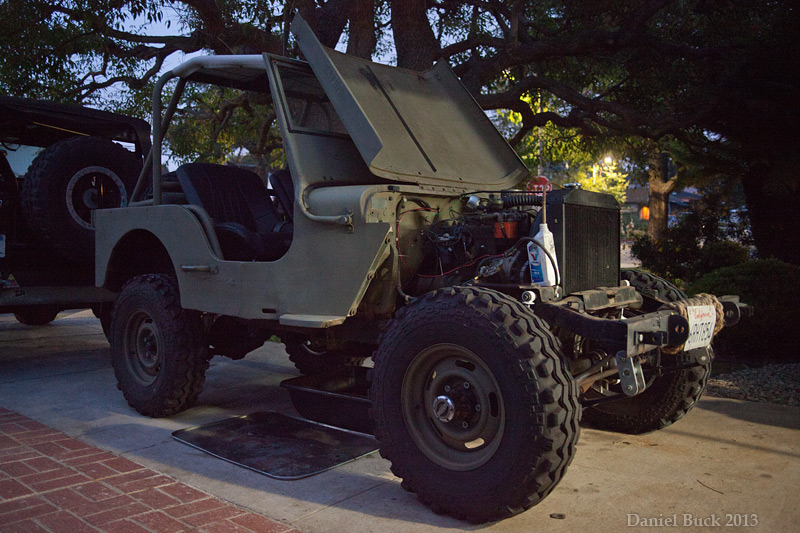
I've started a thread on a few other forums, I'll start one here because I know there's at least one or two other people who are doing this here on CJ2apage, or have already done the same/similar swap.
I've never done an engine swap before, I'm decent with a wrench though, and have a fairly good selection of tools that were my father's. In any case, my 2a is mostly stock with 5.38 gears, T90 transmission and D18 transfer case with Saturn overdrive. 2.5" lift springs, a roll cage, suspension seats, 15" wheels with 31" Superswamper tires, Saturn overdrive and an MB grill. That's probably about as much modification (asside from the engine swap) as I'll be doing. It's mostly a street jeep, but if I find a pair of narrow track offset D44 axles with 5.38 gears in them for a good price some time, I may eventually do that swap as well. It's my daily driver (beautiful weather here in SoCal) but I do want to take it onto some mild-ish trails, so if I ever do find some D44s I might put a selectable locker in them for the times that it'll see dirt. My goal isn't freeway speeds, my goal is to keep up with surface street traffic a bit better, and to be able to hold a 45-50mph cruising speed. Particularly on hills. Right now it's such a dog on hills, after the 31" tires. The engine is a Kubota V2203 DI, which I'll put a turbocharger on there sized for 2.2L. I'll update this thread with some of the stuff I've been doing in the passed week or two, but where I'm at now, I've confirmed that the engine runs, and I've started removing non-essential parts and cleaning it up. I'm almost finished with that stage, then I'll move on to putting on the new/different parts that are needed to get the engine into my 2a. (edit) here's some of the photos up until current:  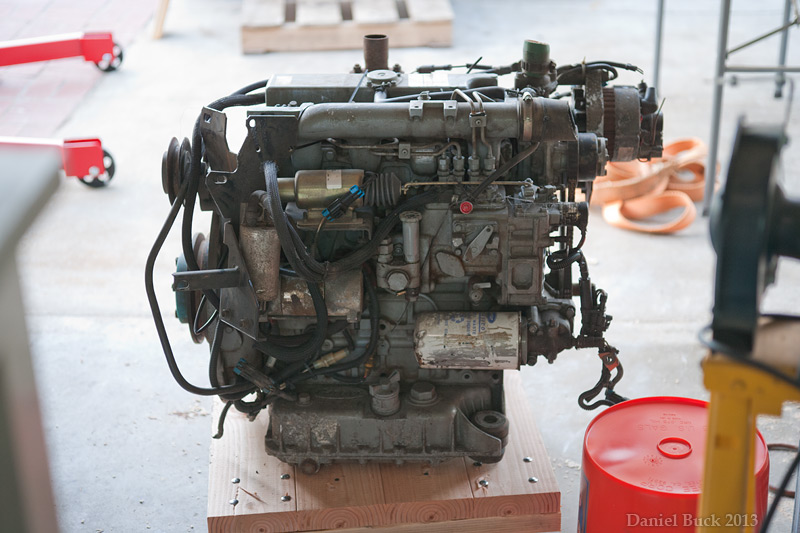 removed the electronic stop solenoid and capped it off (I may put this back later, but to keep things simple now, I've removed it) Also removed the large throttle control solenoid, which was from the "reefer" setup. Removed a bunch of brackets and stuff, as well as the alternator bracket, I'll figure out something for the alternator once I have the turbo on there. 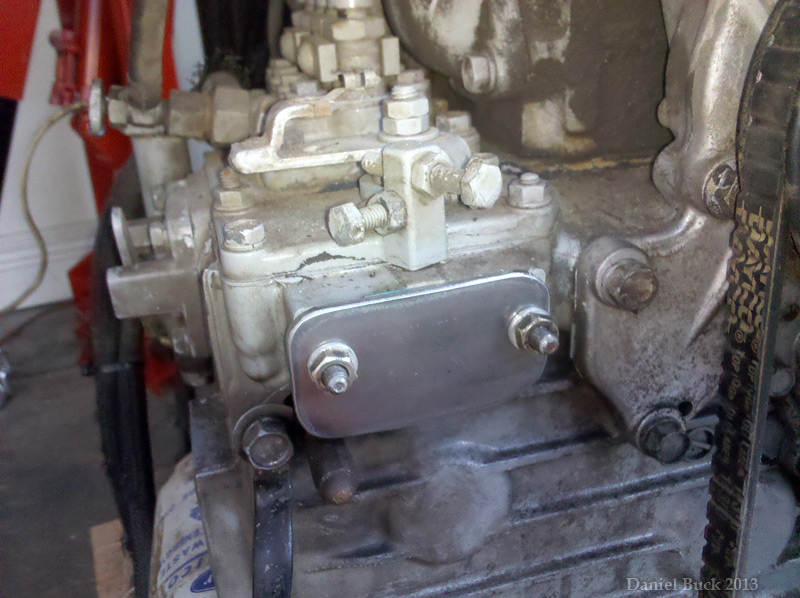 Removed the oil pan and scraped the gasket off removed the oil filter adapter, and put the threaded insert into the motor directly with no 90 degree adapter, I'll use a shorter filter.  And cleaned up the motor real good with degreaser and brake cleaner  Edited by Daniel_Buck - 30 Apr. 2013 at 4:13pm |
|
|
2a #40500
|
|
 |
|
|
Randy Snyder
Member
Sponsor Member Joined: 20 July 2005 Location: Terre Haute, IN Status: Offline Points: 1566 |
Post Options
Thanks(0)
Quote Reply
Posted: 30 Apr. 2013 at 2:28am |
|
Daniel,
Awesome! I'll be watching this post!!  Thanks, Randy
|
|
|
'46 2A #13943
'46 2A #26236 '45 T3-C #436 |
|
|
|
|
Lee MN
Member

Joined: 13 Aug. 2008 Location: Harris, MN Status: Online Points: 4950 |
Post Options
Thanks(0)
Quote Reply
Posted: 30 Apr. 2013 at 3:25am |
|
Daniel, interesting project, were you able to find used parts or are you buying new ?, IMHO you have one of the toughest engines made, the down side of Kubota is you need a firm grip on the parts counter when they tell you the price, LOL. I have seen the engine you have on E-bay very reasonable priced but scared of the upgrade cost to get it to the 60 hp range.
Keep up the good work, Lee 
|
|
|
LEE
44 GPW-The Perfected Willys 49 2A “If you wait, you only get older” 67 M715 American Made Rolling History |
|
|
|
|
Daniel_Buck
Member
Joined: 01 Apr. 2012 Location: Gilroy Status: Offline Points: 1200 |
Post Options
Thanks(0)
Quote Reply
Posted: 30 Apr. 2013 at 5:19am |
|
I got the flywheel and bell housing off, probably not a big deal to most folks who have done alot of engine work before, but it's something I've never done before. Was pretty simple for the most part :)
To keep the engine from turning while I broke loose the flywheel bolts, I took a strip of steel flat bar and bolted the flywheel to the bell housing. Worked perfectly :) Since the engine starts from compression alone, I didn't want this thing firing up on me when I was trying to loosen a bolt, haha! The flywheel suprised me by how heavy it was. I didn't realize it when I was removing it, but it is heavy! It's about 2" thick! It doesn't look that thick until I removed it. haha! So for the bellhousing, I bolted the housing to the engine stand to let the stand take the weight as I loosened the last bolt and pried it loose. That worked out pretty good. And, at the end of the day, I went through my table of spare parts and gathered up all the good looking nuts and bolts and washers from the engine so far. I've got a nice hand full of hardware to be used on other projects. I'm happy with that :) Alot of these bolts look BRAND NEW. And I'm in love with the flywheel bolts, they are very nice, a very fine thread and low profile head with a built-in washer face (however you describe that).    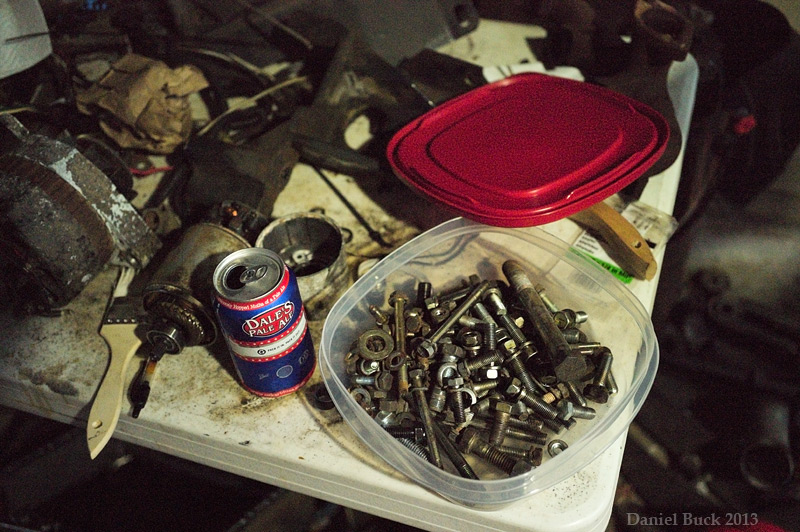 |
|
|
2a #40500
|
|
|
|
|
Daniel_Buck
Member
Joined: 01 Apr. 2012 Location: Gilroy Status: Offline Points: 1200 |
Post Options
Thanks(0)
Quote Reply
Posted: 02 May 2013 at 4:09pm |
|
So, I have always had leaks coming from the bell housing (engine and transmission oil?) of the 2a since the day I got it, and more recently sometimes from the back of the transfer case, at the parking brake.
I was initially thinking about leaving the transmission and transfer case under the vehicle and just popping out the old motor and in the new motor. But now I'm thinking that maybe I should take both the transmission and transfer case out and see if there's any seals/gaskets that I can replace to keep them from leaking? Ideally I'd like no leaks, I don't know how possible that would be but even if I could minimize the leaks, that would be good. Without getting into a full rebuild or taking the things completely apart, are there any seals/gaskets that I can replace to relatively easily on the transmission and transfer case?
Edited by Daniel_Buck - 02 May 2013 at 4:11pm |
|
|
2a #40500
|
|
|
|
|
otto
Member

Joined: 26 Feb. 2012 Location: Orygun Status: Online Points: 2264 |
Post Options
Thanks(0)
Quote Reply
Posted: 03 May 2013 at 12:49am |
|
Won't you need the stop solenoid to shut the engine off? That's how my diesel VW works; 12V supply keeps it open and the engine running.
|
|
|
47 CJ2A w/fuel injected boat engine
48 CJ2A 64 Ford Econoline Travelwagon If you can't get there in a Jeep, get a motorcycle! |
|
|
|
|
Daniel_Buck
Member
Joined: 01 Apr. 2012 Location: Gilroy Status: Offline Points: 1200 |
Post Options
Thanks(0)
Quote Reply
Posted: 03 May 2013 at 2:18am |
|
there's a lever on the side of the engine that you pull to stop it. Since I don't need the choke anymore, I'm just going to connect my choke pull on the dash to the stop lever :) It runs just fine without the stop solenoid. And stops just fine with the manual lever. Later on I may pop the solenoid back in there, but for now, I'll keep it simple, and use the manual lever.
|
|
|
2a #40500
|
|
|
|
|
Bob3b
Member

Joined: 08 Mar. 2010 Location: Akron, Ohio Status: Offline Points: 3097 |
Post Options
Thanks(0)
Quote Reply
Posted: 03 May 2013 at 3:12pm |
|
What do you have to do to your gearing if anything? Diesels turn pretty slow at their peak horsepower. I wonder what that would be compared to the original willys motor?
|
|
|
1946 CJ2A #23881
1953 CJ3b, nice! 1949 Jeepster 1947 Empire Model 90 1985 CJ10A Spen "S" Utility trailer Kubota l3400 |
|
|
|
|
Daniel_Buck
Member
Joined: 01 Apr. 2012 Location: Gilroy Status: Offline Points: 1200 |
Post Options
Thanks(0)
Quote Reply
Posted: 03 May 2013 at 3:59pm |
|
well, my cruising speed (45mph or so) is at about 2000 RPM in overdrive. The diesel can supposedly spin up to 3000, but most people keep it at 2800 I think for the max RPM. Which is faster than I usually spin the flathead.
When I'm in overdrive if I open the throttle all the way on flat ground I can't get it to go much passed 2200. (31" tires) If I'm going down hill, or when I'm goign through the gears, I rarely ever spin passed 2500. So it seems that it'll have about the same RPM range. I don't know how fast other people spin up the flatheads, but I never spin mine very fast. Passed 2500 or so, it sounds like it's going to explode 
So at least for the way I drive, it seems like the motor will be within my usual RPM range. But I imagine I'll have alot more power and torque in that range, 2000-2500RPM on the flathead is probably not even close to it's peek power/torque range? I've read that it's high power range is 3000-3500, but I can't imagine spinning mine that fast, (especially while cruising!) it would probably grenade!  My secret hope is that I can just leave overdrive engaged all the time while driving around town. Right now I have to use it like 4th gear. We'll see if I have enough torque for that with the diesel. I imagine I will, but we'll see :)
Edited by Daniel_Buck - 03 May 2013 at 4:14pm |
|
|
2a #40500
|
|
|
|
|
Daniel_Buck
Member
Joined: 01 Apr. 2012 Location: Gilroy Status: Offline Points: 1200 |
Post Options
Thanks(0)
Quote Reply
Posted: 05 May 2013 at 4:08pm |
|
a bit o progress yesterday :)
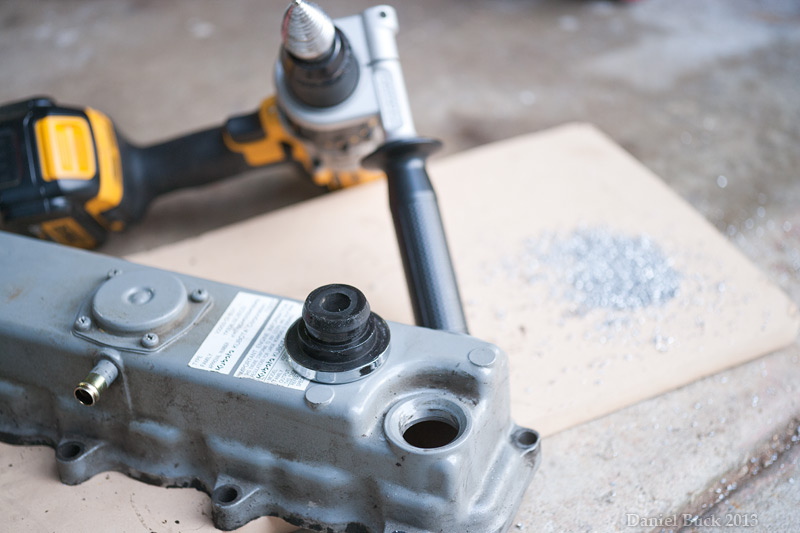
Got the hole for the turbo drain drilled and a spare dipstick tube pounded into the hole. And got the studs inserted for the exhaust manifold. The metal where the hole is for the turbo drain was thicker than I expected, but it drilled just fine. Went slow with some cutting oil, it's at least 1 inch thick, probably 1.5" thick, haha! That's alot of metal shavings! Probably the thickest piece of steel I've ever drilled through. I gingerly ran a tap through the threads for the exhaust manifold to get out any crud in there, there was a decent amount in in there. I think I'm going to pick up a set of metric taps, all I have is standard, and I picked up this one M8 1.25" tap just for the stud holes, since I've now got metric stuff going into my jeep, might as well get a full metric tap set. With the amount of crud that came out of those holes that DID previously have studs in them (removed not a week or two ago) I can't imagine how much crud is in the threads that have been un-used, if I ever want to mount additional brackets for whatever else I might need to mount. I wasn't able to drill the hole for the actual dip stick, it's directly opposite the turbo drain on the otherside of the motor. But the fuel pump & what not are in the way of me getting a good angle on the block with my drill. Not sure what I'm going to do about that. I'll think of something :) Maybe even combining the turbo drain hole with a Y connection, so that it's both the turbo drain and the dipstick, meh. Don't really want to remove the fuel pump and stuff just to drill a hole for the dip stick, but it may come down to that. And I just realized, there's no way to add oil to the engine, haha! The valve cover doesn't have a proper fill cap, since the old oil pan used to have a fill cap on it, the new one doesn't (the new one is much narrower). I'll either pop the valve cover off and drill a hole for a generic/universal filler cap (maybe weld in a bung? if there aren't any press-in bungs?) or just find a valve cover that already has a filler cap if they are cheap enough (some had them, some didn't, apparently)  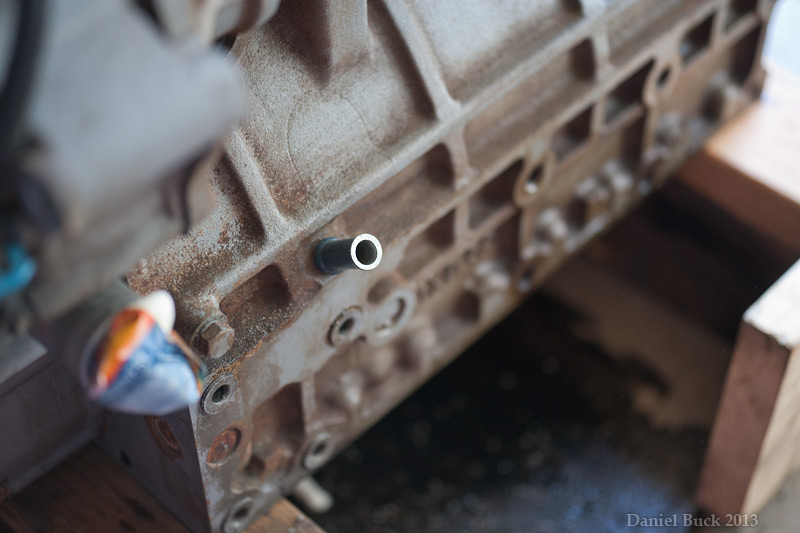  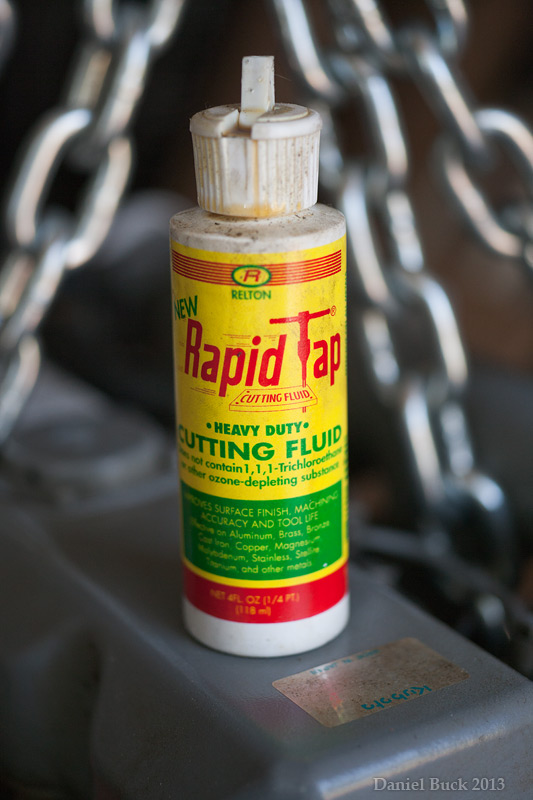 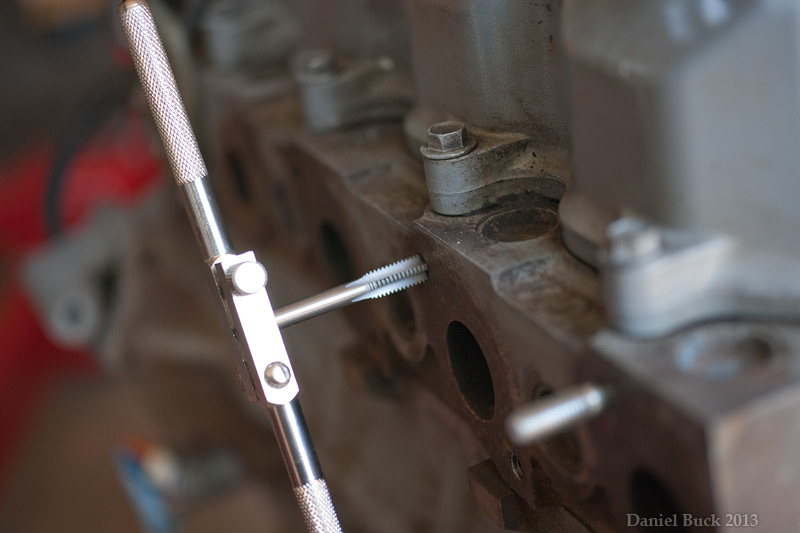 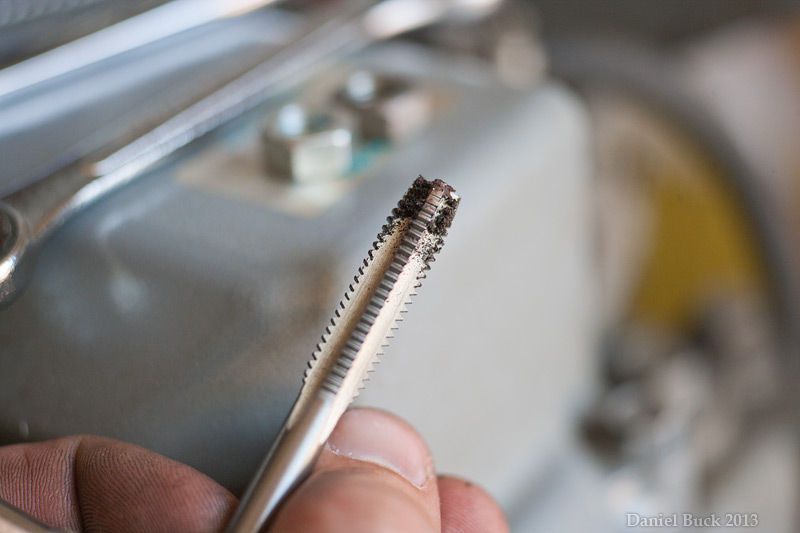 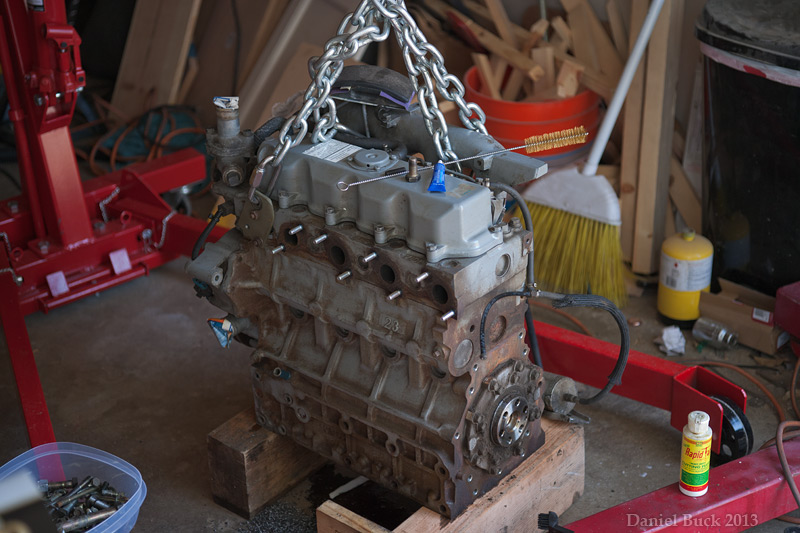 |
|
|
2a #40500
|
|
|
|
|
Mike S
Member
Joined: 20 May 2006 Location: West Coast Status: Offline Points: 2318 |
Post Options
Thanks(0)
Quote Reply
Posted: 05 May 2013 at 4:32pm |
|
I have been following your swap project. Can't wait to see the end result. Nice work.
|
|
|
'47 CJ2A -- #114542
Warn FF D41 rear Lock-Right locker 11" drum brakes Dual master cylinder T90C Transmission 16 X 6 Jeep truck wheels Cooper STT Pro tires |
|
|
|
|
Daniel_Buck
Member
Joined: 01 Apr. 2012 Location: Gilroy Status: Offline Points: 1200 |
Post Options
Thanks(0)
Quote Reply
Posted: 06 May 2013 at 4:26am |
|
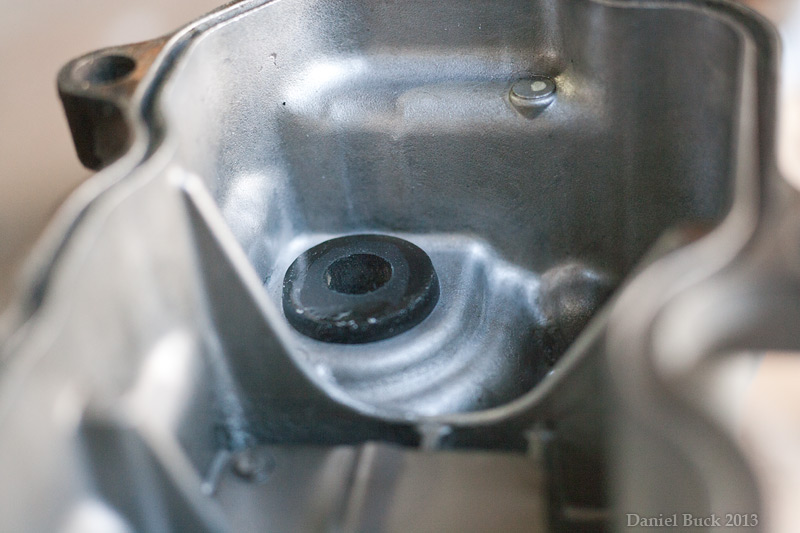
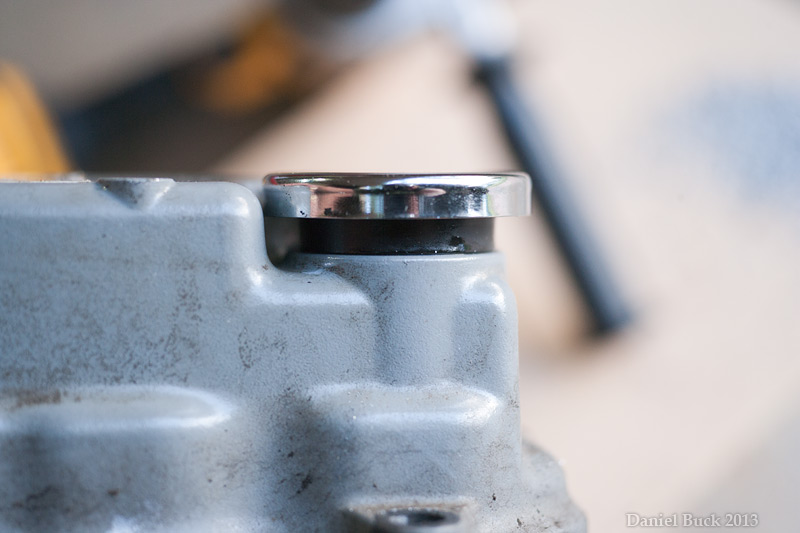
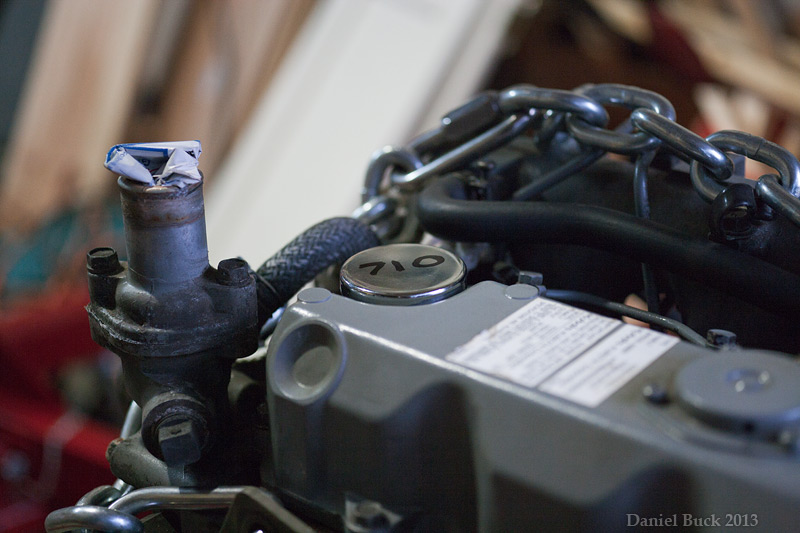
Got the 710 cap in place today. Drilled out the hole in the blank cap spot with a sheet metal bit to 1 1/8", and pressed in a $5 chrome oil cap with rubber fitting. Man, if fits about as perfectly and snugly as it could, like it was made for this valve cover. Part number is Spectre 1738
    Edited by Daniel_Buck - 06 May 2013 at 4:31am |
|
|
2a #40500
|
|
|
|
|
Overland Diesel
Member
Joined: 01 Oct. 2012 Location: St. Marys, Ont. Status: Offline Points: 52 |
Post Options
Thanks(0)
Quote Reply
Posted: 06 May 2013 at 12:12pm |
|
I'll have to right that part number down! Looks great!
 |
|
|
1947 CJ2a -Kubota V2003 turbo diesel
1989 Jeep Wagoneer 3.9L Cummins 1985 Toyota BJ60 3b Diesel |
|
|
|
|
Daniel_Buck
Member
Joined: 01 Apr. 2012 Location: Gilroy Status: Offline Points: 1200 |
Post Options
Thanks(0)
Quote Reply
Posted: 06 May 2013 at 12:16pm |
|
It's a tight fit, you've got to press it in pretty good (I used a bit of oil rubbed around the end of the plug), but it seems to fit. It's relatively easy to open, no need to pry it with a tool or anything. We'll see how easy it is to remove after it's been in a hot engine bay for 3000 miles or so, haha
I did take a few passes with a manual debur tool to the underside edge of the hole, so that the lip of the rubber fitting could pop over the edge a bit easier. Don't know if this is necessary or not, but it seemed like a good idea to at least break the sharp edge there anyway.
Edited by Daniel_Buck - 06 May 2013 at 12:19pm |
|
|
2a #40500
|
|
|
|
|
Daniel_Buck
Member
Joined: 01 Apr. 2012 Location: Gilroy Status: Offline Points: 1200 |
Post Options
Thanks(0)
Quote Reply
Posted: 11 May 2013 at 3:24am |
|
It arrived!! Yay :) The adapter plate, flywheel, motor mounts, turbo, and a bit of hardware.
 |
|
|
2a #40500
|
|
|
|
|
Daniel_Buck
Member
Joined: 01 Apr. 2012 Location: Gilroy Status: Offline Points: 1200 |
Post Options
Thanks(0)
Quote Reply
Posted: 12 May 2013 at 4:26am |
|
A friend came over today with his TJ, so we worked on that for a good part of the day. But I had time to remove the grill and fenders from the Willys in the evening. :)
 |
|
|
2a #40500
|
|
|
|
|
Daniel_Buck
Member
Joined: 01 Apr. 2012 Location: Gilroy Status: Offline Points: 1200 |
Post Options
Thanks(0)
Quote Reply
Posted: 12 May 2013 at 4:44pm |
|
For those of you who have lifted your flathead motors out, where's the best place to mount the lift chains? I haven't looked it over yet for possible locations, but I figured I'd ask to see if there's two good location points that maybe I might overlook. I'll be removing the engine by itself, not attached to the transmission.
And when I separate the engine from the transmission, do I want to have the transmission in gear? or in neutral, or does it even matter? And I'm not going to be needing the bell housing (but I will be keeping the clutch), so for the initial engine removal, is it better to split them apart between the engine and the bell housing, or the bell housing and the transmission? Either way I'll be removing the bell housing from the transmission, what's the simplest location to make the initial split? Silly questions maybe, but I've never done this before, don't want to mess up either of them
Edited by Daniel_Buck - 12 May 2013 at 4:52pm |
|
|
2a #40500
|
|
|
|
|
BillF
Member
Joined: 02 Oct. 2005 Location: Hillsborough NH Status: Offline Points: 1133 |
Post Options
Thanks(0)
Quote Reply
Posted: 12 May 2013 at 5:00pm |
|
With the m38 engine removal I just finished yestarday we left the bellhousing in place. The m38 has a bolt on engine lifting hook, the last cj2a engine I pulled I believe I just wrapped straps around the engine block.
|
|
|
1952 m38
|
|
|
|
|
Post Reply
|
Page 123 30> |
| Tweet |
| Forum Jump | Forum Permissions You cannot post new topics in this forum You cannot reply to topics in this forum You cannot delete your posts in this forum You cannot edit your posts in this forum You cannot create polls in this forum You cannot vote in polls in this forum |


 Topic Options