|
|
|
First time Willys owner, new project |
Post Reply 
|
Page 123 12> |
| Author | ||
LesBerg 
Member 

Joined: 09 Apr. 2014 Location: Athol, ID Status: Offline Points: 1554 |
 Post Options Post Options
") Thanks(0) Thanks(0)
 Quote Reply Quote Reply
 Topic: First time Willys owner, new project Topic: First time Willys owner, new projectPosted: 13 Apr. 2014 at 4:39am |
|
|
Hello everyone,
Just joined the Willys club last Wednesday, so to speak. I bought a CJ2A 157713 from a gent in Old Town, Idaho. The frame and body tags are intact and legible - they match. It's my first Willys or Jeep. Thinking about it, it's my first 4x4 outside driving various vehicles for the army. I've driven lots, just never owned them. She's a bit of a rust bucket... though 'bucket' might imply it could hold water. I promise you, she can't. There's a LOT of rust and evidence of near-terminal abuse. THE GOOD: It's a stretched jeep (Willys? not sure just what to call it with this crowd). It's about 24 inches longer than stock. Though this point could be argued, I think I like the fuel tank at the moment. The original tank was removed, possibly when the body and frame were stretched. The current tank is the width of the outside of the frame rails, as tall as the step from the front floor pan to the rear floor, and as deep as the stretch. I'm not sure what the exact dimensions are. I've been too busy working out the wiring issues. I suspect that the capacity is in the neighborhood of 20-25 gallons. The PO says that the motor was purchased last summer from a retired diesel mechanic in Blanchard. While he had no evidence to back the claim up, oil pressure at idle is about 75lbs. She starts right up and purrs like a kitten. Lacking any exhaust below the manifold, she purrs like a very large kitten. No choke, no pumping. Just turn the key and touch the button. I haven't done a compression test yet, but it's on the to-do list. The carb is a Carter. While the engine fires right up, it smells a tad rich coming off-idle and leaks a bit. Shouldn't be anything a good carb kit can't address. The radiator is very beat up, but it holds pressure and doesn't leak. The heater under the dash just above the driver's left knee is there and the motor runs smoothly. It's not much louder than the heater in my 67 Ford F100, so I figure it's in good shape. I'll plumb it in and pressure test it soon(tm). All the gages except the ammeter seem to be original. At the moment only the ammeter and oil pressure gauge seem to work. The speedometer cable is missing and the gas gauge is disconnected. Given that it's been converted to 12v, that's just fine. The temp gauge is permanently pegged at max. I may attempt to tease the unit apart and see if I can get it going. The original horn is present, and it works. Though it's not connected to anything.... Oh - It moves under it's own power - very good in my opinion.  THE BAD. Unfortunately, this is a large list. The tub's floor is badly rotted. Not so bad that stepping on it poses a risk of falling through, but not far from it. At least the last two POs used it extensively for plowing driveways during Idaho winters. The abuse was enough that the front plow was bent beyond use and the rear 3-point plow was repeatedly ripped off the back - it was bolted through the rear of the tub sheet metal. There is no bumper. The frame been cracked, broken and welded more times than I've been able to count. Fortunately, I was a certified frame repair tech in a previous career. It needs to be reinforced in the area of the stretch, but that's for another time. I need to learn how much a 'jeep' frame needs to flex before I do any reinforcing. If I make it too stiff it can focus stress in other areas of the frame and body and cause more damage than it would otherwise prevent. I won't say the suspension is shot - I don't know enough about these vehicles to know how various problems manifest themselves. That said, the frame almost sits on the axles. The shackles are completely shot and there are no bushings to speak of. The front loops on the front springs have been broken off and welded - the left side loop is offset half the width of the spring to the inside to compensate for the lack of bushings. There are no shocks. At all. The front spring packs have way too many leafs - I quit counting at fourteen on the left side. Needless to say, replacing all the bushings, shackles, and the two front springs are close to the top of the repair list. The brakes don't work. Given that the center of the master cylinder lid appears to have been drilled out, it's my first suspect. I tried pouring fluid in, and the system won't pump up and nothing comes out of the wheel cylinder bleed screws. I'll pull the master cylinder out and see if it's repairable. I suspect I'll be replacing it. Two thirds of the steering wheel has been hacked out. Gonna need to find a used one. Since this won't be a restoration, a functional used one will do fine. The windshield frame is a travesty. Extra metal was welded all around it to mate up with an ad-hoc plywood cab. Returning the factory frame to something approaching original condition scares me more than fixing the tub... If you knew how much I enjoy this kind of work, you'd get a good picture of how bad this is. The left glass is broken. The air cleaner assembly is completely missing. Even though this will (hopefully) be a daily driver, I plan on using a stock oil bath filter. My experience is that even though they are messier and require more maintenance, they do a much better job filtering incoming air, especially in dirty environments. Given that we live two miles down a dirt road I suspect was imported from Dresden and that we plan on spending considerable time on back country Forest Service and logging roads, we'll need all the dirt protection we can get. Anyway, my plan is to build this into a daily driver. Some of you may be familiar with the term 'restification' - a combination of 'restoration' and 'modification' where the modifications are correct to the period the vehicle is from. A '32 Ford highboy roadster with 50's wheels, tires, and a flathead V8 would be a good example of a restification. A poor example would be the same roadster with an electronic ignition and Recaro seats. My only concession to modern tech will be a 12v electrical system. Mainly because the modification has already been done, but we're also planning on using this jeep for hunting and camping in Idaho back country. This is another reason I'm planning on keeping the current fuel tank, at least for now. [edit] Oh, it's also missing wipers and tailgate, and the slip yoke on the front driveshaft is shot. speaking of pictures....  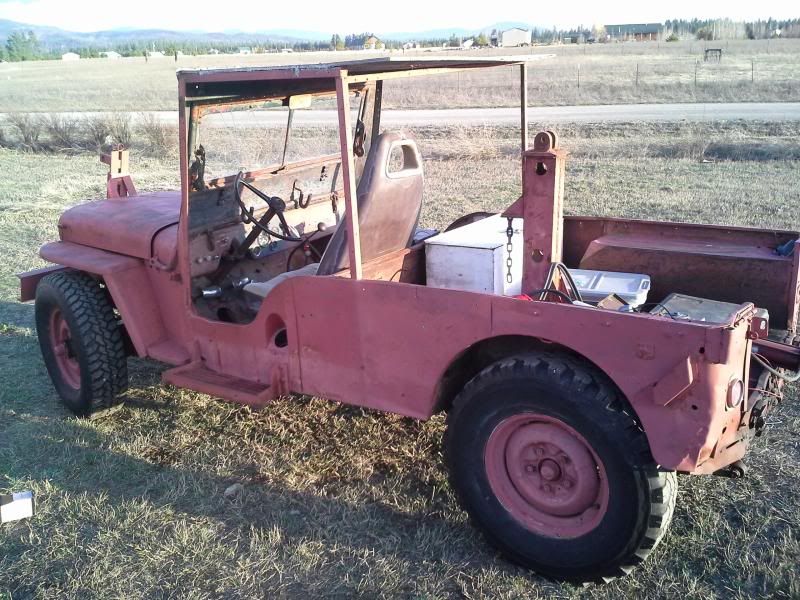 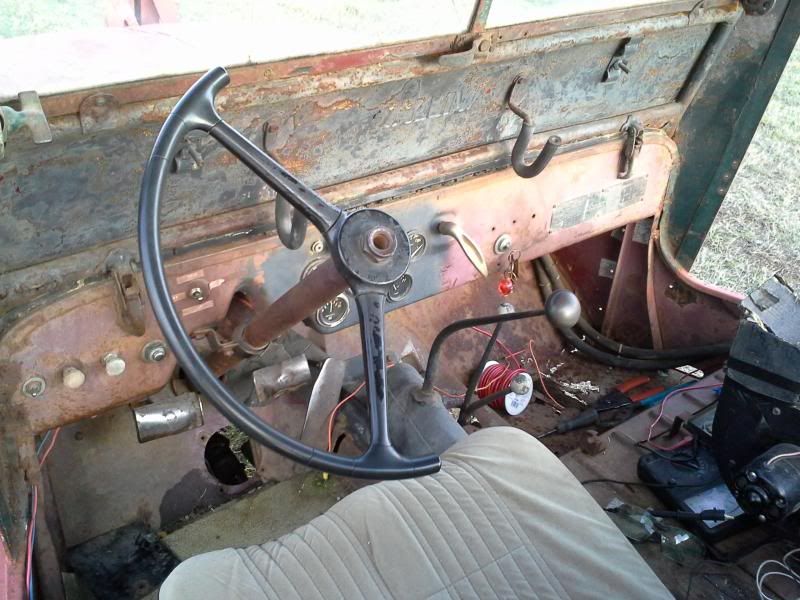 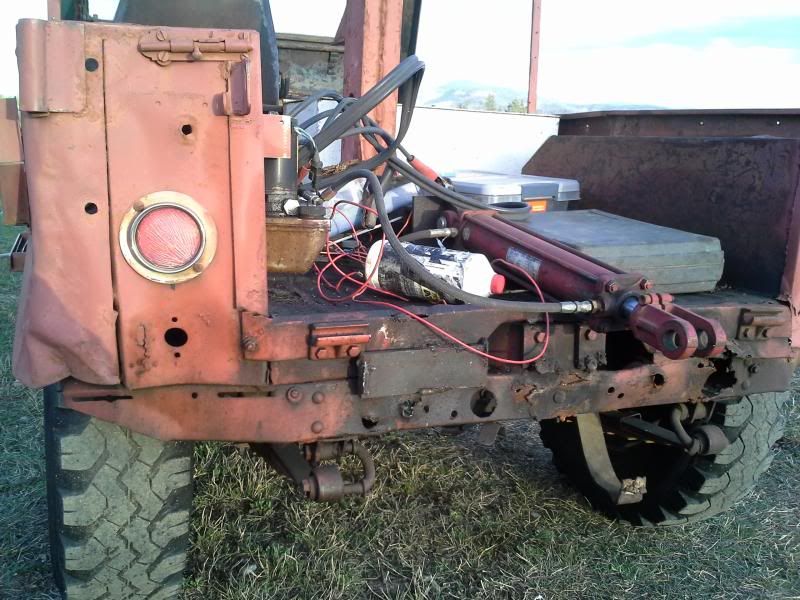 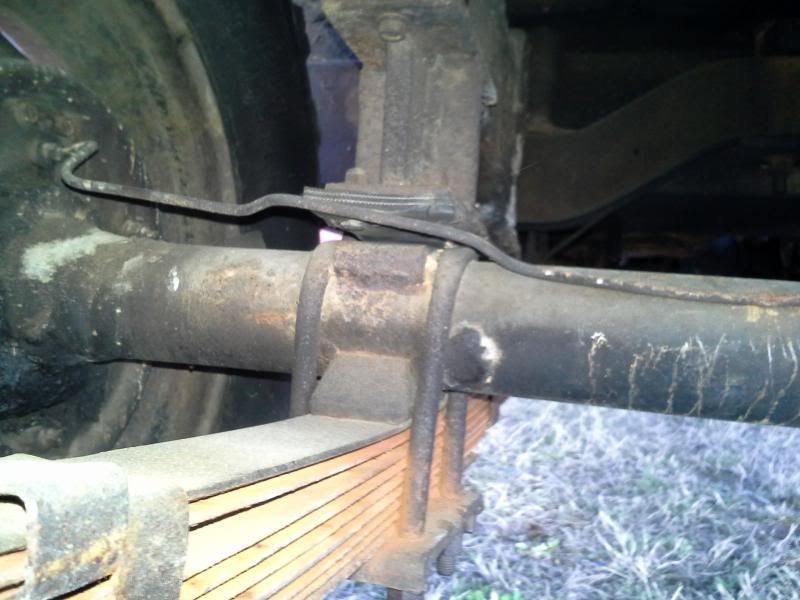 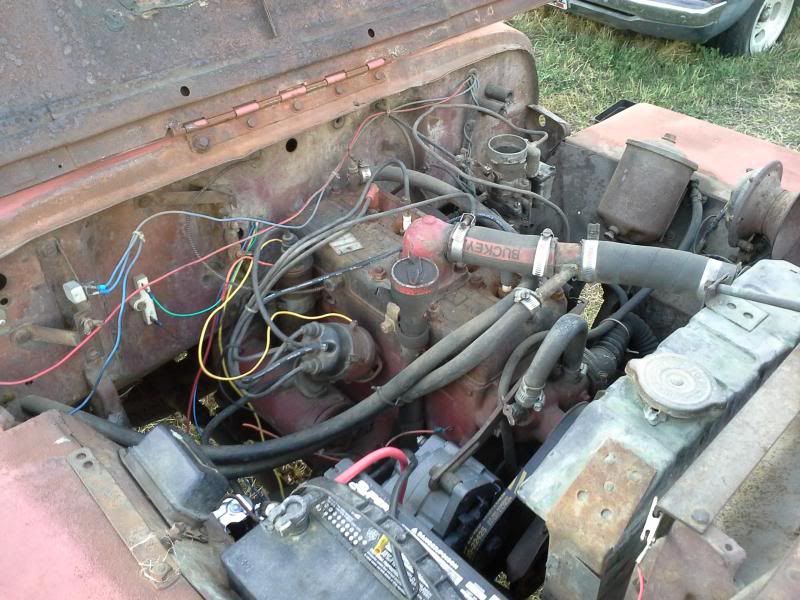 Edited by LesBerg - 13 Apr. 2014 at 6:18pm |
||
 |
||
|
JeepFever
Member

Sponsor Member Joined: 07 Aug. 2012 Location: VA Status: Offline Points: 2750 |
Post Options
Thanks(0)
Quote Reply
Posted: 13 Apr. 2014 at 5:30am |
|
|
. Welcome! . . . sounds like a fun project. Yep, photos would be nice with this unique beast. |
||
|
||
|
rocnroll
Member
Sponsor Member Joined: 20 July 2005 Location: Tuscumbia, AL Status: Offline Points: 13585 |
Post Options
Thanks(0)
Quote Reply
Posted: 13 Apr. 2014 at 5:27pm |
|
|
I want one too
Sounds like a good plan.I like the restification idea. We've talked about these some on here, you might try a search for 'stretched or 'long wheelbase'. Most of the semi factory looking ones seem to have originated in the Pacific Northwest for some reason. (that's where most of them are turning up anyway) Yours doesn't seem to be lengthened the same way so may have just been done by an industrious previous owner. Good luck with it. |
||
|
'47 CJ2A PU
'48 CJ2A Lefty "Common sense is not that common" |
||
|
||
|
LesBerg
Member
Joined: 09 Apr. 2014 Location: Athol, ID Status: Offline Points: 1554 |
Post Options
Thanks(0)
Quote Reply
Posted: 13 Apr. 2014 at 6:10pm |
|
|
Rocnroll, I actually read a number of your posts dredging the Internet for information on it. Taking a close look at the frame splices, the body mods, and the floor, I'm torn as to how 'professional ' this was.
It 's not a particularly pretty job, and a couple of the welds have cracked with the abuse it's seen. But considering that it still runs down the road all these years later says it was at least effective. The top of the body splices also have been rolled/bent to match the square top rail of the original body. THe metal is also of the same gage. The way the stretch was executed wouldn't take a lot of resources. Just two sections of channel to stretch the frame, two pieces of sheet metal to connect the front and rear of the tub, and a fuel tank large enough to completely fill the hole in the floor. Oh - there's also an angled panel that runs the width of the tub behind the seats. It has several of the strap anchors installed. My only real concern with the stretch is that there are no crossmembers in the stretched area. I'm wondering if this could be contributing to the frame breakage at the front, just behind the radiator cross member.  Edited by LesBerg - 13 Apr. 2014 at 6:13pm |
||
|
||
|
LesBerg
Member
Joined: 09 Apr. 2014 Location: Athol, ID Status: Offline Points: 1554 |
Post Options
Thanks(0)
Quote Reply
Posted: 13 Apr. 2014 at 6:23pm |
|
|
I got the headlights working yesterday. Today I'll pull the brake master cylinder and see what's wrong.
So would the bad shackles and missing bushings cause the body to sit so low, or are my spring shot? I'm planning on replacing the front springs because of the strange leaf count and broken/welded elyelets, but I'm curious if just replacing the shackles and busings would fix the back end. Never mind. Having the correct size tires would go farther towards curing this. It would also be less work :P Edited by LesBerg - 22 Apr. 2014 at 6:41pm |
||
|
||
|
LesBerg
Member
Joined: 09 Apr. 2014 Location: Athol, ID Status: Offline Points: 1554 |
Post Options
Thanks(0)
Quote Reply
Posted: 18 Apr. 2014 at 5:06am |
|
|
I've spent the last few days reading builds, tech articles, stories.... Wow. I'm having problems with the brakes. The innards of the master cylinder are shot. I thought about a rebuild kit, but there's horrific pitting in the bore. Looks like a new master cylinder is in my future. I'll be tearing into the brakes this weekend if the rain lets up. I'm going to disconnect all connections and blow out all the lines and hoses. I already have a frame-to-axle hose and the y-block on order from Walcks. The hose is damaged and the y-block was cross threaded. It leaked when I added fluid, so I expect that it's why the MC was dry in the first place. I may have to move right to the floors soon. My son (10) wants to ride in the Willys to and from school on the last day. The rear floor is currently covered by a steel plate - all the stuff in the back is welded to it. Unfortunately, there's a 4x12 hole in the center of the floor under the plate, so removing it is going to do bad things to the structural integrity of the back of the tub. You can't tell from the pictures, but the RT wheelhouse is held on almost solely by the side of the tub. The bracing and cross members at the back of the tub are torn and there's not much left of the floor after I remove the plate. I'm thinking about fabbing a custom floor frame from 1" OR .75" square steel tubing and welding in a flat 12ga floor. THe whole body has collapsed onto the frame - even the front fender braces that bolt to the frame have broken. The hat channels have mostly rotted away - far more air than metal. I'm thinking about using rectangular stock to replace them too, although I could have hat channels made in 8 - 10 foot lengths at a local steel shop. Any thoughts on one vs the other, hat channel vs rectangular tube stock? I don't have the funds for repo style parts and I like that it's stretched, so I don't think there's much point to trying to stick with 'show' parts - that would be like sticking Frankenstein in a tux.... maybe I could paint stitches across the tub splice and stick giant bolt heads out of the fenders.... |
||
|
||
|
gostby
Member
Joined: 05 Jan. 2013 Location: Lincoln WA Status: Offline Points: 334 |
Post Options
Thanks(0)
Quote Reply
Posted: 18 Apr. 2014 at 5:31am |
|
|
Les Berg: I live in Lincoln, WA and shop in Spokane. I have a CJ2A steering wheel I can donate to your cause. Do you visit Spokane or know someone where I could drop it off? Gary.
|
||
|
gostby
|
||
|
||
|
otto
Member

Joined: 26 Feb. 2012 Location: Orygun Status: Offline Points: 2265 |
Post Options
Thanks(0)
Quote Reply
Posted: 18 Apr. 2014 at 5:40am |
|
|
Hagen's Auto Parts in Puyallup WA can rebuild your master cyl with a stainless steel sleeve. They have done both of my jeeps MCs.
|
||
|
47 CJ2A w/fuel injected boat engine
48 CJ2A 64 Ford Econoline Travelwagon If you can't get there in a Jeep, get a motorcycle! |
||
|
||
|
LesBerg
Member
Joined: 09 Apr. 2014 Location: Athol, ID Status: Offline Points: 1554 |
Post Options
Thanks(0)
Quote Reply
Posted: 18 Apr. 2014 at 2:16pm |
|
|
Thank you! I very much appreciate that. I live up in Athol, and I can head over pretty much any time. I run the kids back and forth to school over in Spirit Lake, so I have to be back in the area by 3pm. My job is supporting a medical records system written in an outdated programming language. Fortunately, the year I spent rewriting it has paid off, so now my 'on-call' status has me working like the Maytag Repairman. It leaves me with a lot of 'discretionary time.' I'm actually heading over to Fairchild AFB today to take my mother to the Personnel office. Dad passed away last fall, and we're trying to get her survivor benefits straightened out. Anyway, just let me know what works for you, chances are that it will work for me too.
that great news, actually. thanks for sharing it. I'll probably order a complete unit from Walcks, but I'm one for having spare parts on hand. The old MC is a Wagner-Lockheed unit and I'd like to return it to service. I'll track down their number and give them a call. What did they charge you, if I may ask? I'll be looking for rims at some point. Mine are all vintage pieces in 16x6, but they aren't matched. The fronts are slotted KH style, and the rears are truck rims. It doesn't much matter to me, but I still need a spare and one of my fronts is bent. Same goes for tires. They're mixed too. Fronts are 235/85r16s and the rears are 7.50x16s. They appear to be the same height, but combined with lots of weather checking and cracks, they won't be seeing paved surfaces ever again. I'll be looking for tires suited to mud and snow that are reasonable on pavement. I've trolled the forums here a bit and I'm thinking the Super Traction tires are going to fit the bill. Now I have to get them to fit the wallet... I also need to scour google maps in satellite view. An older gent who runs a garage in Spirit Lake knows of a guy north of town with 300+ vintage jeeps on his property. I should be able to find him Edited by LesBerg - 18 Apr. 2014 at 2:46pm |
||
|
||
|
LesBerg
Member
Joined: 09 Apr. 2014 Location: Athol, ID Status: Offline Points: 1554 |
Post Options
Thanks(0)
Quote Reply
Posted: 19 Apr. 2014 at 12:45am |
|
|
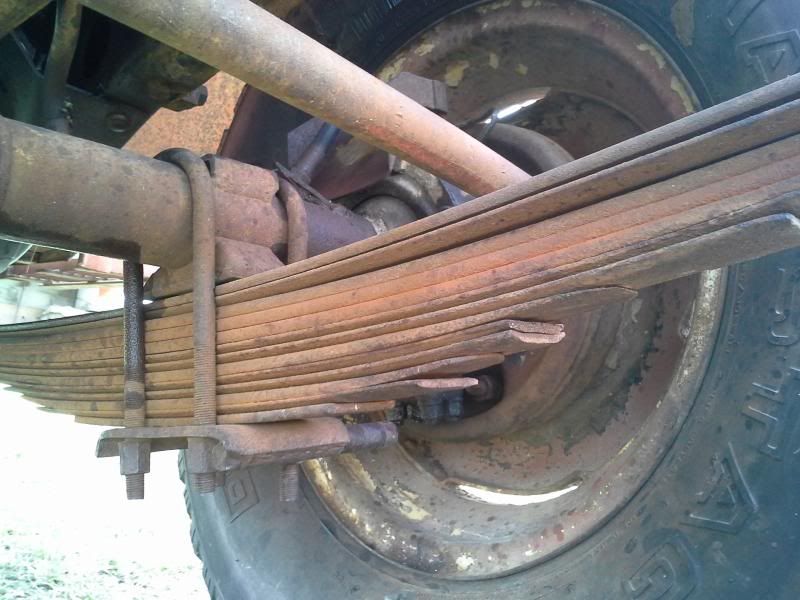
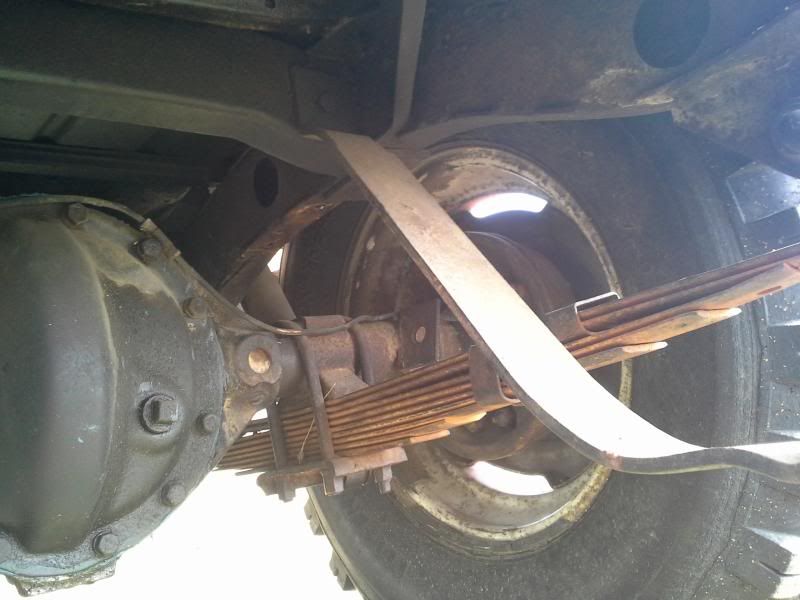
OK, I figured out the front springs. I've been spending every waking moment reading the tech section. Someone did a write up about the heavy and light spring packs, and my front packs seem to be home-grown to support the mammoth front plow that was on this little beast. They alternate heavy and light leafs, six of each. I can jump on the front bumper and they don't flex! To put that in perspective, I'm 5'10 at about 260lbs.
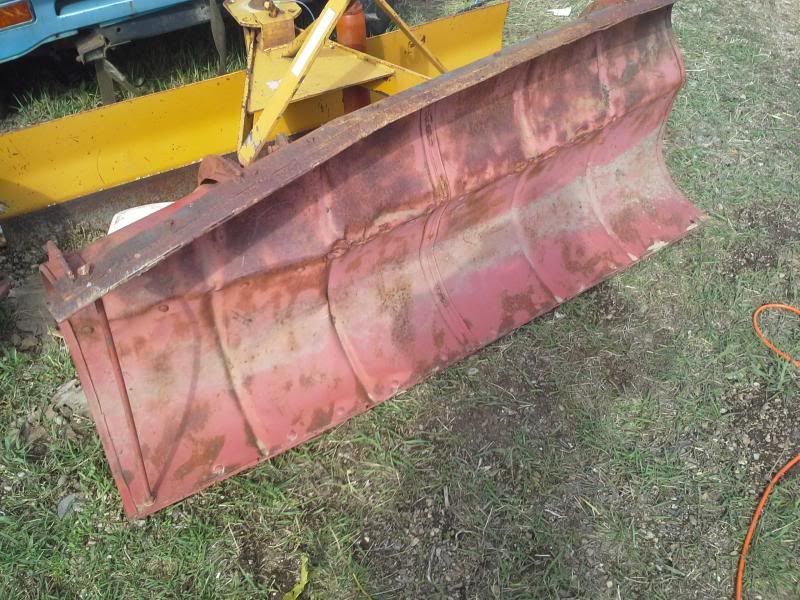
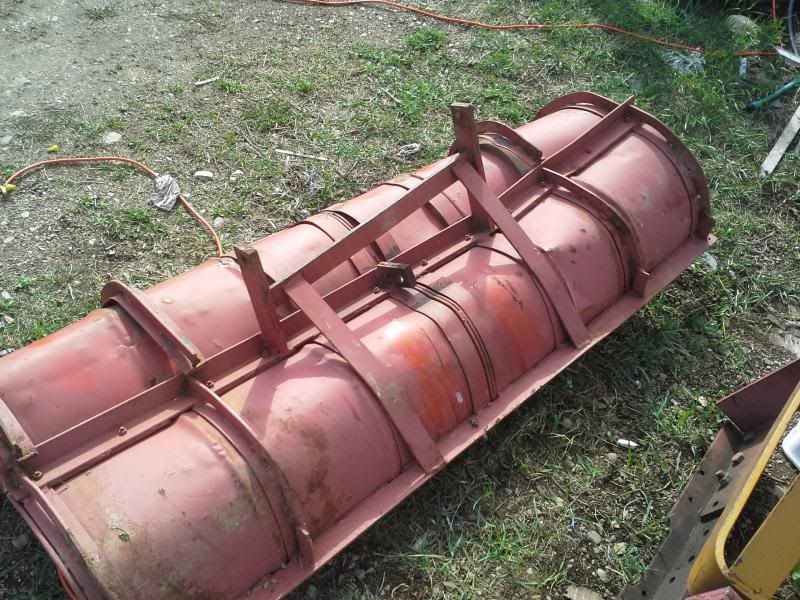
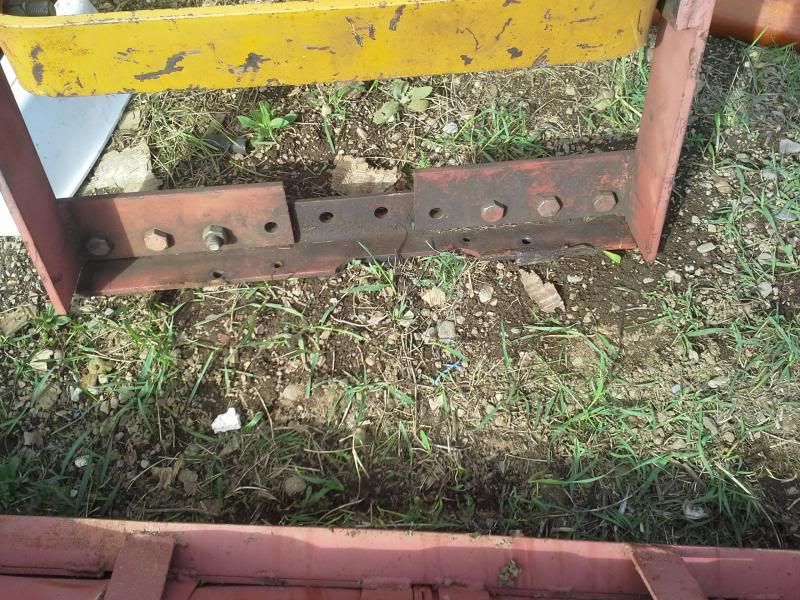
You've seen the front plow mount, still attached in the pictures in the original post. It's definitely not stock, and certainly not lightweight. Here's the plow that goes with it. The P.O. said he bent it up plowing snow. I don't buy that for a second. I've been trying to figure out the construction, because certain parts look 'finished' and some don't. If you look closely, you'll see that the blade is made from two sides of a 30 gallon drum, and the rest is cut from 1/4" and 3/8" steel stock. it weighs almost as much as I do.
I bet the breaks in the frame are directly caused by the front springs not dissipating any impact energy. Looking at the back plow, I think I recognize part of the rear drawbar. One of the mangled drawbar supports hangs from the cross member above the rear axle
I'm thinking to pull all the heavy leafs from the front spring packs, since the rear packs use the light springs. Edited by LesBerg - 19 Apr. 2014 at 12:56am |
||
|
||
|
otto
Member
Joined: 26 Feb. 2012 Location: Orygun Status: Offline Points: 2265 |
Post Options
Thanks(0)
Quote Reply
Posted: 19 Apr. 2014 at 12:49am |
|
|
Hagen's Auto Parts 253-845-7020 charged me $65 to install the sleeve and they can supply a rebuild kit for the MC. It's better if you get the kit from them so they can properly finish the sleeve to fit the kit. I preferred repairing the OEM MC over buying a new one that was likely imported; plus stainless won't corrode.
|
||
|
47 CJ2A w/fuel injected boat engine
48 CJ2A 64 Ford Econoline Travelwagon If you can't get there in a Jeep, get a motorcycle! |
||
|
||
|
LesBerg
Member
Joined: 09 Apr. 2014 Location: Athol, ID Status: Offline Points: 1554 |
Post Options
Thanks(0)
Quote Reply
Posted: 19 Apr. 2014 at 1:09am |
|
|
That sounds like a plan. I give them a call and get it shipped off as soon as budget allows. I wonder if they can replace the cap? Mine had a 9/16 hole drilled through it and was filled with water (which explains the corrosion). The local Napa says they can do the same thing, but they also are convinced that I'm an idiot. It's a long story, but suffice it to say that their computer lists the knuckle hose as the frame-to-axle hose and the counter guy insists the computer is correct. That said, I don't think I'd trust Napa to get the job done right. |
||
|
||
|
LesBerg
Member
Joined: 09 Apr. 2014 Location: Athol, ID Status: Offline Points: 1554 |
Post Options
Thanks(0)
Quote Reply
Posted: 19 Apr. 2014 at 3:43am |
|
|
So the current short term goals are:
I read an article about lubrication in the Go-Devil motor, and now I'm concerned about my oil pressure. At 650rpm it reads 70 lbs. The PO claims it was a recent rebuild, but it still sounds high. I'm wondering if the builder did anything weird with the oil system. Looking at it, it's a 4T serial number with a truck front plate with a correct head. stupid question: Is it normal transfer case operation to only be able to engage the front axle in low range? Edited by LesBerg - 19 Apr. 2014 at 3:46am |
||
|
||
|
LesBerg
Member
Joined: 09 Apr. 2014 Location: Athol, ID Status: Offline Points: 1554 |
Post Options
Thanks(0)
Quote Reply
Posted: 22 Apr. 2014 at 6:33pm |
|
|
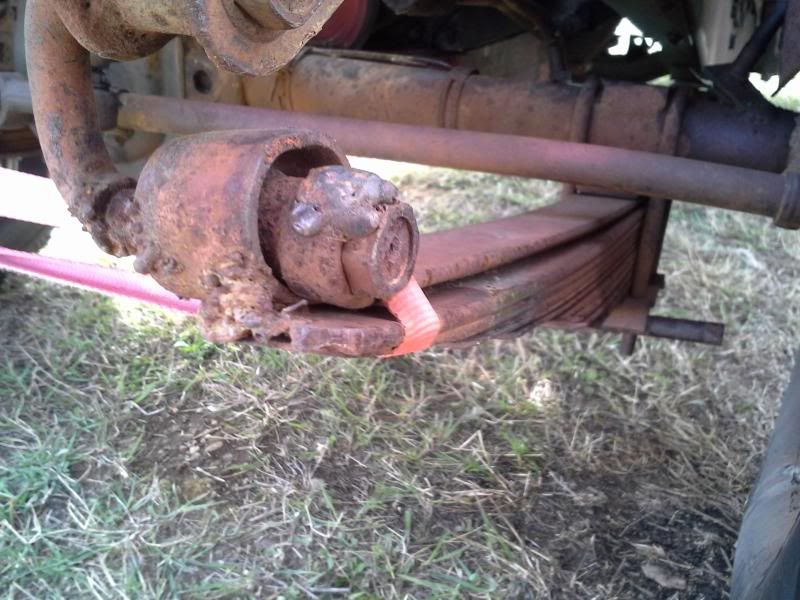
I busted out the body tools yesterday and gave the tub a good trashing.
 Before:   After:   Now I just need to weld the bejeezus out of the bumper.... It seems she had a factory drawbar at one point, but everything points to it being torn violently off - lots of torn out sheetmetal, amazingly bent supports, and only bits of the two center vertical straps left - you can see them in the second photo, right under the hydraulic cylinder. They're sheared off right under the lower bolt. You can also see one of the support straps/braces that should run from the bottom of the drawbar to the crossmember above the axle. It's the bit that lookslike it's protruding from the passenger side springs. The other brace is similarly mangled, but it was torn completely off. It's in the white box in the back of the bed. I also discovered that the front lower kingpin has almost a half inch of slop... Checked all the wheel bearings - tightened the left front, the others are good. I tried to rotate my wheels - The drivers side front rim is bent a bit and I wanted it on the back. Turns out that the wheels on the back won't fit on the front, the center holes won't fit over the hubs. So it looks like I need three rims, not one. BTW, it turns out that Autozone carries tie rod ends and king pin bearings for the CJ2A, you just need to use the part numbers from Walcks. Not trying to undermine Walck, but sometimes you need parts now. |
||
|
||
|
LesBerg
Member
Joined: 09 Apr. 2014 Location: Athol, ID Status: Offline Points: 1554 |
Post Options
Thanks(0)
Quote Reply
Posted: 22 Apr. 2014 at 6:36pm |
|
|
Quick question: What should the measurement for the width of the tailgate opening be?
Enough of the welds are pulled out that the wheel houses and back corners can move a around a good (bad!) inch or so...
|
||
|
||
|
gostby
Member
Joined: 05 Jan. 2013 Location: Lincoln WA Status: Offline Points: 334 |
Post Options
Thanks(0)
Quote Reply
Posted: 22 Apr. 2014 at 8:45pm |
|
|
Les: Fairchild would be convenient to me. Are you making a return trip there? Gary
|
||
|
gostby
|
||
|
||
|
LesBerg
Member
Joined: 09 Apr. 2014 Location: Athol, ID Status: Offline Points: 1554 |
Post Options
Thanks(0)
Quote Reply
Posted: 23 Apr. 2014 at 12:09am |
|
|
I certainly could. My mother would likely jump at a chance/excuse to get out to the BX. Let me know when you'd like to make the run.
Thanks again!
|
||
|
||
|
LesBerg
Member
Joined: 09 Apr. 2014 Location: Athol, ID Status: Offline Points: 1554 |
Post Options
Thanks(0)
Quote Reply
Posted: 23 Apr. 2014 at 1:35am |
|
Edited by LesBerg - 24 Apr. 2014 at 6:32pm |
||
|
||
|
Post Reply
|
Page 123 12> |
| Tweet |
| Forum Jump | Forum Permissions You cannot post new topics in this forum You cannot reply to topics in this forum You cannot delete your posts in this forum You cannot edit your posts in this forum You cannot create polls in this forum You cannot vote in polls in this forum |


 Topic Options
 gostby wrote: