


|
|
|
1948 CJ2A restomod build |
Post Reply 
|
Page <1 23456 7> |
| Author | |
bkwudz 
Member 

Joined: 27 Feb. 2010 Location: Billerica Ma Status: Offline Points: 514 |
 Post Options Post Options
") Thanks(0) Thanks(0)
 Quote Reply Quote Reply
 Posted: 12 Mar. 2013 at 5:06pm Posted: 12 Mar. 2013 at 5:06pm |
thanks, it really does not go anywhere its left unatteded too long
|
|
 |
|
|
Schimms15
Member

Joined: 17 Jan. 2011 Location: milwaukee, Wisc Status: Offline Points: 2953 |
Post Options
Thanks(0)
Quote Reply
Posted: 12 Mar. 2013 at 6:23pm |
|
1 more question how thick is the metal pan protecting your gas tank? 18 ga? any fear of rocks or something going through it and the tank?
|
|
|
46 2a
51 truck project named Karen |
|
|
|
|
bkwudz
Member
Joined: 27 Feb. 2010 Location: Billerica Ma Status: Offline Points: 514 |
Post Options
Thanks(0)
Quote Reply
Posted: 13 Mar. 2013 at 12:31am |
I think it's 1/8, if it starts to see a lot of offraod time. Then I'll build something a little more beefy. |
|
|
|
|
bkwudz
Member
Joined: 27 Feb. 2010 Location: Billerica Ma Status: Offline Points: 514 |
Post Options
Thanks(0)
Quote Reply
Posted: 25 Mar. 2013 at 5:04pm |
|
Out of the garage for the first time in about a year!
|
|
|
|
|
rocnroll
Member
Sponsor Member Joined: 20 July 2005 Location: Tuscumbia, AL Status: Offline Points: 13583 |
Post Options
Thanks(0)
Quote Reply
Posted: 25 Mar. 2013 at 6:00pm |
|
.....I like it!
|
|
|
'47 CJ2A PU
'48 CJ2A Lefty "Common sense is not that common" |
|
|
|
|
Luke_S
Member

Joined: 06 June 2012 Location: west tn Status: Offline Points: 181 |
Post Options
Thanks(0)
Quote Reply
Posted: 26 Mar. 2013 at 12:01am |
|
what does your two piece shaft consist of?
|
|
|
|
|
bkwudz
Member
Joined: 27 Feb. 2010 Location: Billerica Ma Status: Offline Points: 514 |
Post Options
Thanks(0)
Quote Reply
Posted: 26 Mar. 2013 at 12:07am |
It's 2 shortened early CJ front shafts And a carrier bearing ! |
|
|
|
|
1947J@@p
Member

Joined: 15 July 2010 Location: Virginia Status: Offline Points: 21 |
Post Options
Thanks(0)
Quote Reply
Posted: 01 May 2013 at 12:58am |
|
I really like the fuel tank job you did, very clean looking. Got a few questions. What model and year is the filler from. What are the dimensions of the tank and where did you purchase. What was the tank skid out of? Thanks |
|
|
Pete
|
|
|
|
|
bkwudz
Member
Joined: 27 Feb. 2010 Location: Billerica Ma Status: Offline Points: 514 |
Post Options
Thanks(0)
Quote Reply
Posted: 01 May 2013 at 2:41pm |
|
thanks, the filler is YJ vintage, but the hoses were modified, the tank I believe a DJ postal jeep, not sure the year, the skid is CJ5. It has to be one of my favorite modification to the willys,
|
|
|
|
|
bkwudz
Member
Joined: 27 Feb. 2010 Location: Billerica Ma Status: Offline Points: 514 |
Post Options
Thanks(0)
Quote Reply
Posted: 01 Oct. 2013 at 7:51pm |
|
Been driving it around a ton, and did some small projects, I installed a York compressor for OBA, with a small tank in the back.
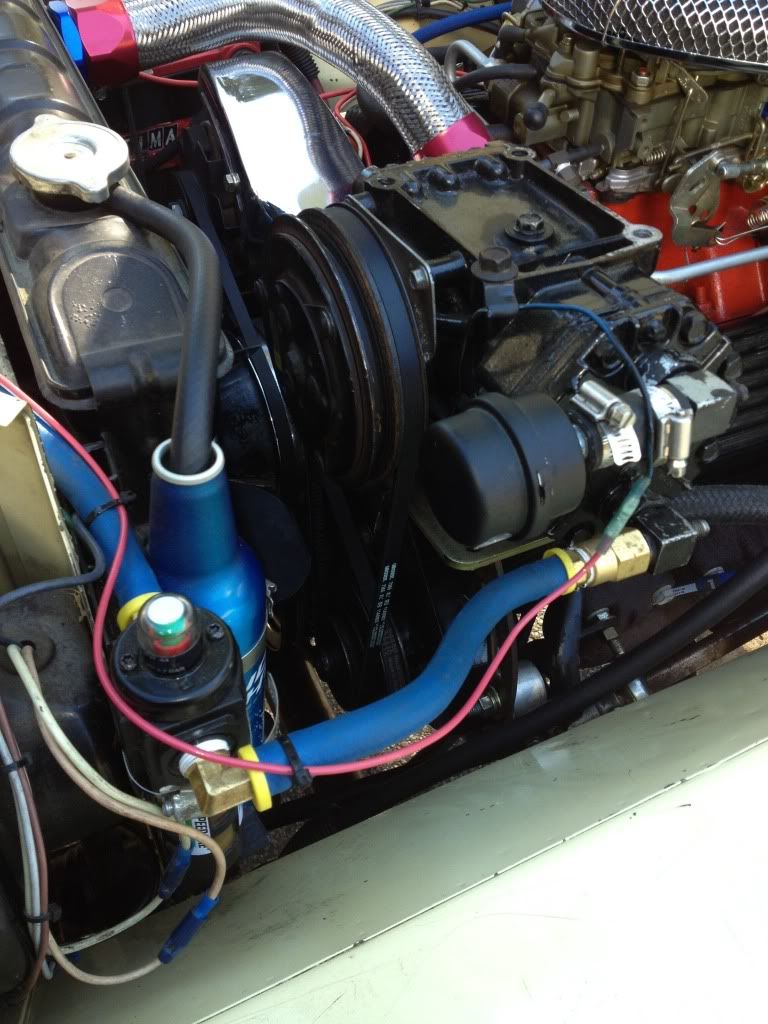  Found a small retractable hose reel, I was able to plumb into the system 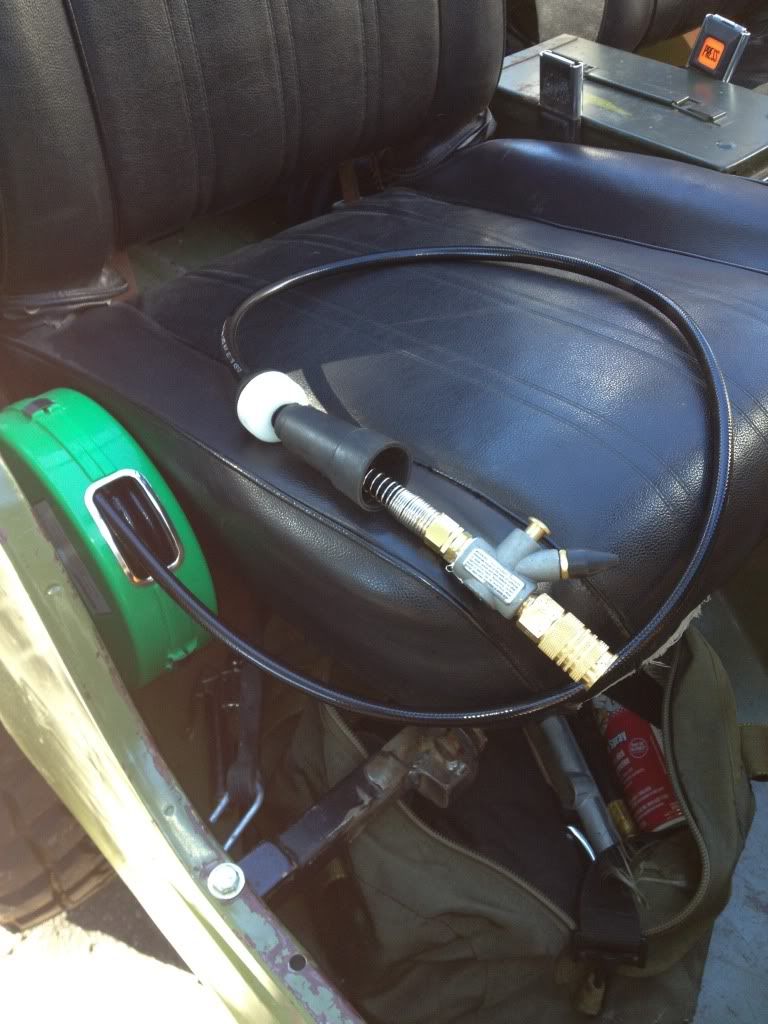 I also upgraded the electrical system, and detailed the engine a bit 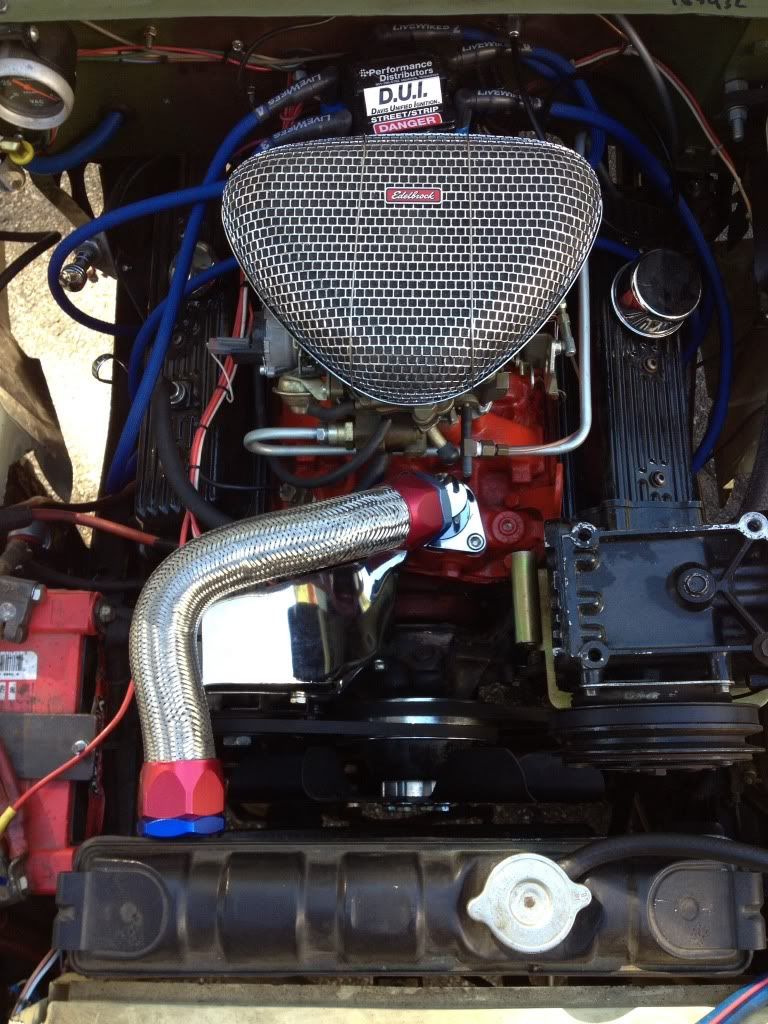 |
|
|
|
|
jpet
Moderator Group 
Sponsor Member x 5 Joined: 30 Apr. 2008 Location: Ramsey, IL Status: Offline Points: 11173 |
Post Options
Thanks(0)
Quote Reply
Posted: 01 Oct. 2013 at 10:44pm |
|
Looks good!

|
|
|
CJ2A #29110 "General Willys"
MB #204827 "BAM BAM" "We do what we can, and we try what we can't" |
|
|
|
|
bkwudz
Member
Joined: 27 Feb. 2010 Location: Billerica Ma Status: Offline Points: 514 |
Post Options
Thanks(0)
Quote Reply
Posted: 16 Mar. 2015 at 2:40pm |
|
too long for an update, not much to report, just drove it around a lot working out the bugs. I did remove the rear family cage, and the swing out tire carrier. It just didn't look right, there was too much going on in back..like a mullet.
   |
|
|
|
|
bkwudz
Member
Joined: 27 Feb. 2010 Location: Billerica Ma Status: Offline Points: 514 |
Post Options
Thanks(0)
Quote Reply
Posted: 27 Mar. 2015 at 12:51pm |
|
The paint work continues, That's the only problem with having the Tech school do the work. Instructor says one day kids are motivated and stuff gets done...next day all they are worried about are the budding romances in shop.
  the windshield frame must of had 50 different size screw and bolt holes all around the frame...they have welded up all of them.  They got the paint, so they sprayed a fender to see how I liked it.  I loved it, but they are repainting the fender, instructor was not happy with the end result. This is the look im going for, but with a less bright red wheel, more of a deep red. And I think Barcelona red seats.  But what a chore trying to find 15x8 steel wheels that will clear the brakes. I have been looking for weeks. I finally called Wheel VIntiques, and they will build a set of there 62 Series 15 x 8, 4" BS CJ pattern for just under $500 to my door.
|
|
|
|
|
Lemield
Member

Joined: 18 Jan. 2008 Location: Arvada Colorado Status: Offline Points: 501 |
Post Options
Thanks(0)
Quote Reply
Posted: 27 Mar. 2015 at 3:23pm |
|
VERY cool Jeep! Love your overflow bottle. ;)I used a pre-prohibition 4 Aces Whiskey bottle for mine....

Edited by Lemield - 27 Mar. 2015 at 3:27pm |
|
|
Larry
1949 CJ2A "Little Stinky Green" Kubota Diesel Powered 1970 Chevy C20 454 "Big Red" 1971 Chevy K20 6.2 Diesel "Pumpkin Wagon" 2001 Mercedes CLK320 2003 Cadillac Seville |
|
|
|
|
Joe Friday
Moderator Group
Sponsor Member x 2 Joined: 26 Dec. 2010 Location: Jeep Central Status: Offline Points: 3654 |
Post Options
Thanks(0)
Quote Reply
Posted: 27 Mar. 2015 at 6:08pm |
|
What did you decide to do about steel wheels?
|
|
|
|
|
bkwudz
Member
Joined: 27 Feb. 2010 Location: Billerica Ma Status: Offline Points: 514 |
Post Options
Thanks(0)
Quote Reply
Posted: 27 Mar. 2015 at 6:45pm |
|
Im painting the aluminum ones on there, flat black to see how it looks. Probably wont use them, but It doesn't cost anything, and the finish on 2 of the wheels was damaged.
I also ordered a custom set from Wheel VIntiques, plain steel 62 Series 15 x 8, 4" BS CJ pattern
|
|
|
|
|
724wd
Member
Joined: 15 Nov. 2014 Location: Spokane, WA Status: Offline Points: 83 |
Post Options
Thanks(0)
Quote Reply
Posted: 28 Mar. 2015 at 2:41am |
|
Very nice project, Sir! My daughter and I are doing something similar and it looks like you solved some problems we may encounter as well.
What Mustang radiator is that? We have a I-4 153 GM with both radiator outlets on the passenger side. I saw another member run a hose across the bottom of the radiator to reach the stock lower connection, and that is certainly an option, but I take it this Mustang radiator has the outputs correctly placed for GM engines? What prompted the carrier bearing front drive shaft? We have a th350 slated for use and I had heard of interference issues, but yours is the first I've seen documented. I had heard offsetting the drive train to the drivers side created clearance for a stock style drive shaft. Is your engine mounted in the center, or was there some other issue that caused the interference? Again, you have a very nice rig there! I am showing my daughter what you've accomplished for inspiration! Heath |
|
|
|
|
rocnroll
Member
Sponsor Member Joined: 20 July 2005 Location: Tuscumbia, AL Status: Offline Points: 13583 |
Post Options
Thanks(0)
Quote Reply
Posted: 28 Mar. 2015 at 3:57am |
|
Most any radiator shop will swap the outlets to either side you need for a nominal charge. They just solder a patch over the hole after they remove the outlet or inlet.
I've had a couple done with no problems whatsoever. Makes for a much neater installation than running hose all over the place. |
|
|
'47 CJ2A PU
'48 CJ2A Lefty "Common sense is not that common" |
|
|
|
|
Post Reply
|
Page <1 23456 7> |
| Tweet |
| Forum Jump | Forum Permissions You cannot post new topics in this forum You cannot reply to topics in this forum You cannot delete your posts in this forum You cannot edit your posts in this forum You cannot create polls in this forum You cannot vote in polls in this forum |


 Topic Options
 Schimms15 wrote: