Bantam T3-C Serial #24011
Printed From: The CJ2A Page
Category: Bantam Trailer - Discussion - For Sale - Wanted
Forum Name: Bantam Trailer - Your project
Forum Description: This forum is to show everyone progress on your trailer!
URL: https://www.thecj2apage.com/forums/forum_posts.asp?TID=42731
Printed Date: 24 Apr. 2024 at 2:22am
Software Version: Web Wiz Forums 12.06 - http://www.webwizforums.com
Topic: Bantam T3-C Serial #24011
Posted By: takesiteasy
Subject: Bantam T3-C Serial #24011
Date Posted: 05 July 2018 at 4:00pm
|
New member- first post. Lots of great information here. Acquired this trailer on an impulse a couple of weeks ago. It is a Bantam T3-C. The nameplate is attached but barely legible. Near as I can tell it is # 4017 . Still sorting out my plans for it. Probably just gonna clean it up and paint it. (Edit 10/7/2018: further investigation shows the serial number to be 24011- see follow-up posts below) It's pretty solid- but needs sandblasting to clear surface rust off the underside so I can see how bad the rust is. Needs new tires so that is the first thing I am working on. Also repacked the bearings which looked pretty good. The tailgate chains are gone and the gate was bolted shut. The safety chains have been modified. Has the original Fulton hitch coupler but the locking tab is gone. I am going to try to make a replacement. If anyone has some good closeup pics of one I would appreciate seeing them. I've seen the ones on the the Bantam webpage. Any thoughts or suggestions are welcome. Here's a couple of pics:    |
Replies:
Posted By: nofender
Date Posted: 05 July 2018 at 10:10pm
|
Man! I'd love to find one in that condition around here! Looks like a gem. Congrats. ------------- 46 CJ2a rockcrawler 46 CJ2a - 26819 46 Bantam T3c "4366" 47 Bantam T3C - 11800 68-ish CJ5 |
Posted By: takesiteasy
Date Posted: 06 July 2018 at 8:58pm
Thanks. It will still be a project, but that's what I wanted.
|
 nofender wrote:
Posted By: takesiteasy
Date Posted: 06 Sep. 2018 at 2:21am
|
Well, the trailer got new shoes so it is mobile now. Hauled it over to a friend's shop so we can work on it. Towed great on the highway but bounced a bit going through some road construction. It will be interesting to see how it does when loaded.  The trailer is generally in good shape. But closer inspection is revealing some rust issues- not unexpected. So far we have removed the fenders and the tailgate and repaired some random bolt holes and a couple small tears. The tailgate was attached with homemade hinges which we cut off. I have ordered new hinges to match the original ones. The tailgate was pretty bowed out so we used the hydraulic press to straighten it- worked pretty well.    We are getting it ready to haul to the sandblaster. Decided to remove the floor. It's not real bad- just a couple of holes but the underside has a lot of surface rust. It is also cratered a bit- looks like a few loads of boulders were dumped in at some point. The frame is really solid with only one bad rust spot near one of the
shackles. As long as we're at it, it would be nice to be able to get at
the whole frame to fix any rust spots that are covered by the floor and
sides. Sides are really good with just a couple of issues.   Once we get it back from the sandblasting, we will fix the bad spots, put in a new floor and move on to painting. Thinking ahead, I've got a few things to ponder. Advice is requested. What is the proper location for the tailgate hinges? I've seen some near the edge of the tailgate and some inset maybe 6 inches away from the edge towards the center. Should I try to remove the springs and put new hardware on? The shackles look good but the bolts are rusted. We'll see what they look like after sandblasting. What about putting shocks on it? I've read how to do it but am uncertain
if there would be a payoff. Would that lessen the bouncing? Seems a lot of that comes just from the tires. Would that diminish the "original" aspect
and be a detriment to people looking to restore to original? Similar question for the landing leg and coupler. They are in really good condition but the bolts are rusted. I'm wondering if I should remove them for painting and install new bolts. Where do people buy replacement bolts, shackles and other hardware? Any recommended suppliers? What color should I paint it? I have found both red and green paint
in different spots so hard to know what was original. Should I remove the original serial number tag and look under there? Are there color
chip numbers for matching original paint colors? I was also thinking of
going white to match my truck- but not sure about that. Well that's a long post and lots of questions. I hope some of you experienced folks can help me out.  |
Posted By: PackRat
Date Posted: 06 Sep. 2018 at 7:52pm
|
The hinges on #21170 are 29 1/2" apart. The springs are the same as a WWII jeep front springs and aftermarket springs from Rancho or from Ron Fitzpatrick Jeep Parts will work. Adding shocks like the WWII trailers had is not a bad idea at all as that may stop some extreme bouncing when you go off-road. Try to find the same Grotelite bezels and reflectors (No.100 marked) as they are available. I would remove the drawbar, the drawbars and the Fulton hitch/coupler and blast them independantly then paint and reassemble after everything cures WELL. Be very careful in trying to unbolt them though...if you do break them, Fastenal may be a good place or maybe an ACE hardware? The tab for the Fulton coupler has been fabricated and I think someone has posted pics of here somewhere. By the way, your pic of a hole in the front corner is the same as the holes in the front corners of my trailer. "Water Letter Outters" I believe since the post war Bantams did not need to float (well, the tailgate isn't watertight anyway!). That's a start....post more pics as you go along though! ------------- GPW-17963 4/24/42 Ford F-250 Alaskan Camper Bantam T3-C #21170 |
Posted By: PackRat
Date Posted: 06 Sep. 2018 at 8:06pm
|
If you click on the Bantam trailer data plate icon at the top right corner, you can go to a chart that tracks the features of many T3-Cs. After looking at the drawbars which have a SLANTED gusset in them rather than the WWII-style "VEE" gusset which was used up past #10,000, I checked your data plate up close and I think I see a "2" in front of the "4017". That would make it a 1947 trailer. You can check the chart for others in the 20,000 range for characteristics to compare yours to vs. a "4017" numbered plate sequence. ------------- GPW-17963 4/24/42 Ford F-250 Alaskan Camper Bantam T3-C #21170 |
Posted By: takesiteasy
Date Posted: 07 Sep. 2018 at 3:29am
Thanks for your comments! Good eye on the data plate. I will check that out and see if I can confirm the "2" in front. Makes sense with the other attributes you point out- the drawbars and the shackles seem to be the later style. Learning more every day.
|
Posted By: takesiteasy
Date Posted: 07 Sep. 2018 at 3:31am
|
I'm having a hard time finding the upper shock mounting brackets. Does anyone know where I can find some? Edit: I did find some repop mounting brackets at DLBensinger. Here is a link. https://www.dlbensinger.com/shop/mbt-frame-shock-bracket/" rel="nofollow - https://www.dlbensinger.com/shop/mbt-frame-shock-bracket/ They are the threaded type that were originally installed on the military version of the trailer (BT3). We had to drill the bottom of the bracket and weld in a captured nut for bolting to the frame but otherwise they worked out fine.  Here's a pic of the completed underside showing the new shocks:  |
Posted By: takesiteasy
Date Posted: 07 Sep. 2018 at 3:39am
I did make a tab for the coupler. I will link to it here to add it to this build thread: https://www.thecj2apage.com/forums/fulton-coupler-locking-tab-replacement_topic42749.html" rel="nofollow - https://www.thecj2apage.com/forums/fulton-coupler-locking-tab-replacement_topic42749.html  |
Posted By: PackRat
Date Posted: 07 Sep. 2018 at 7:04pm
|
If you want to bolt on some upper shock mounts, go to the http://www.g503.com" rel="nofollow - www.g503.com website and scroll down to the 1/4 ton Trailer section. If you check it out you may find someone scrapping a basket case who will unbolt them for you. I would just have hem torch out the section of the frame they are located on so you can do a careful removal on your own. Once you have them primed and painted and ready to put back on, you can ask here for a measurement to bolt them on (the very early T3-Cs used the WWII left overs and will have the bolt holes in the frames) or go back to the G503 or, check out any WWII 1/4 ton and measure them your self. ------------- GPW-17963 4/24/42 Ford F-250 Alaskan Camper Bantam T3-C #21170 |
Posted By: takesiteasy
Date Posted: 09 Sep. 2018 at 1:57am
I took a closer look at the data plate today and confirmed the faint #2 in front of the 4017 which would make the serial number 24017. Thanks for pointing that out! edit- more info on the serial number: Here's a larger pic of the data plate- the faint "2" is more
visible. The third digit in this pic looks like it could be a "9" but in
most other photos it looks like "0". The last digit looks like a "7"
but in some other photos I can talk myself into thinking it is a "1". Between looking at the real thing and the photos, I
think the number is "24017" but it could be "24917" or "24011". I'm
interested in what others might think.  The trailer is now totally disassembled and loaded in the truck for delivery to the sandblaster. We went way further than I was planning to go but we will get a better result so I am ok with it.
|
Posted By: takesiteasy
Date Posted: 11 Sep. 2018 at 4:36am
|
Delivered the trailer in pieces to the sandblaster today- will get it all back in about a week- then the fun begins. We will have a bit of welding/repair to do on the frame and tub as well as putting in a new floor. Ordered all new bolts- most of the old ones were pretty rusty and quite a few broke during removal. I will soon have to make a decision on paint color. No one has weighed in on that yet- what's up? My choices are 1) original green, 2) olive drab, 3) white to match my truck. What do people think? Anybody out there have an opinion?   |
Posted By: mickeykelley
Date Posted: 11 Sep. 2018 at 5:30am
|
What I've read is they originally were either green or red. Not sure if the red is the same as the Willys Presidential red or not. When I get to that stage, I'm going with red to match the red jeep. What floor are you replacing it with? Or just patching in panels? Mine has holes any still trying to decide.
|
Posted By: takesiteasy
Date Posted: 11 Sep. 2018 at 3:25pm
Thanks for your comments. I can see both green and red on the hubs- looks like green was first and then red. Removed the data plate before sandblasting and the paint under that looks like green. The last paint was a kind of olive drab. So I'm not getting any direction from the trailer, haha. I'm replacing the whole floor. It wasn't that bad but there were a few holes and it was pretty cratered between the frame supports. I will use pieces of the old floor to patch a couple of spots in the tub. I'm so deep into this thing that I've decided to try to make it look good when it's done.
|
Posted By: canorisa
Date Posted: 12 Sep. 2018 at 1:23am
|
Takesiteasy: This is my Bantam before and after restoration. The original - original color of this trailer was red. I found out that when I pulled the wheels off and when I pulled the fenders off but someone, at some point in it's life, had spray painted the trailer white. By the time I found it, it was a rusty white color, lol. I went with Bengal Red for color and yes it is powder coated and like you I was in it too deep by the time I decided to go that rout, so that is the end result. Can't wait to see yours when finished. Are you sure you want to cut out the original floor on your trailer? Mine was and is a bit wavy and I had to patch some holes on it but luckily I had someone with me with the expertise and taught me how to close those holes for good. They weren't that big to begin with but they did bothered me after I took the trailer apart. Well, that's your call. Here are some pics of before and after....   ------------- Once a Marine!, Always a Marine!, Semper Fi! - Combat Wounded Vet, Desert Storm/Desert Shield - Persian Gulf 1992 E-mail: canorisa@msn.com 1940's Bantam T3-C |
Posted By: cpt logger
Date Posted: 12 Sep. 2018 at 4:22am
|
Oh boy, I get to vote!! Since I use all of my equipment, I would go with OD green, or some flat color. Not White. I would also find a color I can buy in rattle cans. Perhaps OD? Obviously, what works fore me may not work for you.
|
Posted By: mickeykelley
Date Posted: 12 Sep. 2018 at 5:01am
| Posting pics of the beds would be great to see the wave. I'm still trying to decide myself. |
Posted By: canorisa
Date Posted: 12 Sep. 2018 at 5:17am
Here's a pic of my trailer's bed before restoration. For the life of me, I can't find the one after restoration. Notice in the picture where the waves are. You can tell where the bottom beams are. It's pretty wavy but I added a diamond plate 1/2" thick rubber mat on top and it's pretty nice. You can't tell the waves on the floor of the trailer now.   ------------- Once a Marine!, Always a Marine!, Semper Fi! - Combat Wounded Vet, Desert Storm/Desert Shield - Persian Gulf 1992 E-mail: canorisa@msn.com 1940's Bantam T3-C |
Posted By: mickeykelley
Date Posted: 12 Sep. 2018 at 2:14pm
| That's about how my waves are. Debating on whether to spend the money or if the new will just start to wave quickly too. I plan to actually use mine, but no abuse it. I don't think the replacements are substantially any stronger so to avoid waves would need to add more supports. |
Posted By: takesiteasy
Date Posted: 12 Sep. 2018 at 2:37pm
|
I don't have a good picture of the floor showing the dents. It looked very similar to Canorisa's, with a few small rust holes added. The main supports were very obvious high points with pretty deep dishes between. The floor actually looked pretty good from the top, other than the dents. I originally planned to leave the floor and put in a false hardwood floor over it to level it out. What you can't see is the amount of rust on the underside. I suspected the sandblaster would blow some additional holes in the floor and enlarge the small ones. But my main concern was possible rust on the top of the frame under the floor that I couldn't see and wouldn't be able to treat. I didn't want to put all this work in and have the frame rust out from under the floor. Plus there were some rust holes in the tub at the wall/floor joint that would be hard to patch with the floor in. So we decided to take it out. It wasn't difficult to remove- I suspect it may be harder to put it back together, haha. I agree, the new floor won't be any stronger than the old one. I also plan to eventually use the trailer so I am considering adding some additional cross members for support since it is all taken apart now and would be relatively easy to do.
|
Posted By: mickeykelley
Date Posted: 12 Sep. 2018 at 6:45pm
| how did you go about taking it out? Just cut the welds to the frame underneath then run a cutting blade around the inside edge? |
Posted By: takesiteasy
Date Posted: 12 Sep. 2018 at 9:26pm
|
We cut the welds from inside the tub first which released the walls. Once they were free, we set the walls aside. We ended up leaving a bit of the floor attached to the front wall as it
was tough to get into the corners. Once the walls were off, we could remove
the remaining bit of the floor. Then we flipped the trailer over and cut the floor welds along the frame. We used a 3" cutting wheel on a pneumatic grinder. We needed to do some grinding cleanup on the tailgate area, mainly due to the bubba hinges that had been added. The rest of the frame was pretty clean. I'm glad we did it because the repairs to the frame will be so much easier and the sandblaster will be able to get all the rust off, even on the top which is hidden by the floor. I'll post some photos.
|
Posted By: takesiteasy
Date Posted: 12 Sep. 2018 at 9:55pm
|
Here's some pics of the floor (there were some holes which aren't visible in these pics):    |
Posted By: takesiteasy
Date Posted: 12 Sep. 2018 at 9:58pm
Canorisa- I have read your whole build thread- beautiful trailer! Mine will not look like that when it is done. |
Posted By: takesiteasy
Date Posted: 12 Sep. 2018 at 10:05pm
cpt logger- I also plan to use my trailer and I am leaning toward OD green and a flat finish to hide imperfections. I like your comment about using a color that is easy to find in rattle cans so scratches can be repaired easily.
|
Posted By: takesiteasy
Date Posted: 12 Sep. 2018 at 10:08pm
|
Note to those following this thread- I updated the earlier post on the serial number with a new photo. |
Posted By: canorisa
Date Posted: 13 Sep. 2018 at 8:50am
Thank you Sir for the complement. I wanted, at some point, sell the trailer but I can't get out of it what I put into it, so I kept it for now. Everyone who knew about my build, at the time, knew that I was going to sell the trailer but when they found out by how much they all threw a fit, so even though they had a good point I decided to keep the trailer a little bit longer. The trailer sits in an inside storage unit right now collecting dust because I'm no where near the trailer but will soon be out having fun for sure and I can't wait. I look forward to seeing your trailer restoration as you continue and see it finished. Are you going to go with OD Green as it was suggested to you? Do you have any vehicles with OD green on? Most people try to match their pulling vehicle. I ended up not doing that so I went red and can't tell you it was the best choice. After restoration I had the former owner bugging me to sell it back to him, lol. Oh well, right!!!  ------------- Once a Marine!, Always a Marine!, Semper Fi! - Combat Wounded Vet, Desert Storm/Desert Shield - Persian Gulf 1992 E-mail: canorisa@msn.com 1940's Bantam T3-C |
Posted By: takesiteasy
Date Posted: 13 Sep. 2018 at 3:35pm
|
Canorisa, these projects have to be a labor of love, right? It's fun and gives me something to do. I will never get the dollars out that I put in, and that is with free labor! But at the end of the day, I'll have a nice trailer to use, I will have supported some small businesses along the way and I will have saved a bit of history.That all makes it worthwhile to me. I don't have any OD vehicles- I drive a white Tacoma. My original plan was to go white to match the truck- I did the wheels white. But I am rethinking that- not a practical color for a working trailer. OD seems the most logical choice. Even though it is not factory original, it goes with the military heritage and is very practical from a use and maintenance point of view. It can be easily repainted in the future. So that's my current thinking... Thanks for your comments! |
Posted By: PackRat
Date Posted: 16 Sep. 2018 at 6:30pm
|
With your new pic, I think the serial number is 24911. I say that because I think I can see the bottom of the last digit looking exactly like the bottom of the easily readable "1" right next to. In fact, if you look at the font we are using right here, the "7" has no bottom bar and the "1" certainly does. So, my money is on "24911"..... ------------- GPW-17963 4/24/42 Ford F-250 Alaskan Camper Bantam T3-C #21170 |
Posted By: takesiteasy
Date Posted: 17 Sep. 2018 at 1:26am
PackRat, kudos to you and your eyesight! I got out my old
magnifying glass and in the setting sun, the last digit turned out to be
clearly a "1". There are a couple small rust spots that in certain
angles make it look like a "7" but on close inspection, it is possible
to see the straight vertical portion of the "1" and then the faint serif
at the bottom. The third digit is definitely a "0". I'm pretty
confident now saying the number is "24011". I
decided to get a better camera (better than my phone, haha) to see if I
could document what it is possible to see inspecting the real thing. I posted what I got below. Looking again at my original pic at the start of this thread, it seems obvious there also. I just jumped to a conclusion too soon.   |
Posted By: canorisa
Date Posted: 17 Sep. 2018 at 4:01am
Takeiteasy: Thank you for your comment and I'm sorry if I mislead you one my post. I never meant to imply that I wanted to get the money I put into it from my labor. I knew right of the bat that I would never get that out of the trailer. But the people who saw me restoring this trailer were very...should I say for lack of better words, pushy into having me get out all of my hard labor. I have practically lots and lots of hours spent on this build but I always thought it was something I truly enjoyed doing. Not according to other people as I found out later. But that was back in California. I'm now in Florida and I still might sell the trailer but wish it could go to someone who might appreciate it very much and not butcher it but I know that's not my call. So, my apologies if that came out the wrong way. Trust me, I have more than fun at restoring these little trailers and I do it for the fun of it and not take myself that much serious. ------------- Once a Marine!, Always a Marine!, Semper Fi! - Combat Wounded Vet, Desert Storm/Desert Shield - Persian Gulf 1992 E-mail: canorisa@msn.com 1940's Bantam T3-C |
Posted By: takesiteasy
Date Posted: 17 Sep. 2018 at 4:09am
|
Canorisa, Thanks for your comment. We're on the same page.
|
Posted By: Unkamonkey
Date Posted: 17 Sep. 2018 at 6:36am
If you enjoyed it, you got value from it. I can't say that I really enjoyed doing my 3B but I feel that I did quite well so I am happy. Then again the oldest restoration I helped a guy with was a 1906 Buick. I got nothing but I knew that I helped get an old car on the road. ------------- uncamonkey |
Posted By: takesiteasy
Date Posted: 19 Sep. 2018 at 4:01am
|
So I got my trailer parts back from the sandblaster today. Everything looks good except discovered a cracked top leaf spring in one pack- bummer! I also discovered they are not a matched set, so one side or the other has already been replaced. I'm thinking I need to replace the springs. I am looking for advice on where to find a replacement set of springs. These springs have 5 leafs. I have found cj2a front spring packs available with 8, 9 and 10 leafs but nothing with 5 leafs. It seems the trailers originally had the cj2a springs. Is it acceptable to replace the 5 leaf with 8 leaf? Will they be too stiff? Anybody got a recommendation? Parts all cleaned up:  Here's a closeup pic of the broken leaf- it's the top (longest) one:  |
Posted By: PackRat
Date Posted: 22 Sep. 2018 at 7:18pm
|
My trailer #21170 also has five leaves and mine has a broken #4 leaf on one of them. It only added to the uneven bouncing the trailer did as the spring load is uneven. The Bantam Trailer list does not indicate any reported spring information and pics show eight and ten leaves as well as the five we have which are beefier to start with. I don't know if you can find any #1 leaves but if you replace that whole spring pack with another 5-leaf spring pack, I would really be interested in that #4 in the one you pictured above. FYI...the eight leaf springs as used on WWII/CJ2As were rated for much more weight than the trailer can carry. The trailer is rated for 1050 lbs I think with any of the various spring packs and the eight leaf types were replaced in late 1944 to beef up the suspension on the WWII trailers so I think you could use the eight or ten leaf springs or if you find another orphan 5-leaf you could make one out of two. Let me know what you end up doing as I will be interested in that #4 in the 5-leaf spring pack in your photo if it becomes available! ------------- GPW-17963 4/24/42 Ford F-250 Alaskan Camper Bantam T3-C #21170 |
Posted By: takesiteasy
Date Posted: 23 Sep. 2018 at 1:37am
I'm guessing either of us would have to find an intact spring and part it out. Maybe we could share the cost of buying one good spring and we could each get what we need. I am planning to keep the original springs so that I can put them back on if I can fix the broken leaf. I will keep my eyes open and let you know if I find one.
|
Posted By: PackRat
Date Posted: 23 Sep. 2018 at 6:43pm
|
Both of my spring packs are like the one on the LEFT in your pic of them on the table so I need the #4 with the slightly tapered ends. I see you have one of them (on the left) and another with squared-off ends on all leaves. I believe you have two different styles but I have no way of knowing if they have the same spring responses. So....If we found a five-leaf with the riveted keeper on it and that is the one you need a new #1 on, then we could split it between us. On the other hand, if you can check the resistance of both while on the bench and detect a big difference, maybe some repop springs will work for you. ------------- GPW-17963 4/24/42 Ford F-250 Alaskan Camper Bantam T3-C #21170 |
Posted By: takesiteasy
Date Posted: 24 Sep. 2018 at 4:05pm
|
I'll have to check again which set has the broken leaf. I did buy some repop springs with 8 leafs- will see how they compare with the old ones. Meanwhile, we did a test fit on the new floor- fits perfect. I got the floor from Midwest Military. They did a one-off for me. Same floor as the MBT without the drain and the flange is bent down at the tailgate end. It fits perfectly. As a result, John at MW said they will offer the T3-C floors as a new product. We have rehabbed the frame and tub walls. Straightened the tailgate which was bent. Did some metal shrinking on that which was a new experience for me and interesting to do. Cut out all the rusted areas in the frame and tub and replaced with new metal welded in. Did the same with the fenders. It's all ready to paint. Trying to decide on the build sequence now. I would like to get paint on all surfaces before reassembling the tub to the frame but the paint will get in the way and complicate the process of welding the tub and floor back to the frame. Anyone have thoughts on that? Here's a pic of the new floor test fit on the frame with the tub walls:  |
Posted By: PackRat
Date Posted: 24 Sep. 2018 at 6:25pm
|
Buy some primer that can be welded through and get the whole sandblasted assembly protected from flash rust! Then you can clean up any blackened steel from the welding and re-prime and paint. Anything that is a bolt-on should get primed right after sandblasting if no repairs are needed. That includes the final color paint you choose. If you clean our the ball socket, don't paint where the ball will ride, a little axel grease will prevent rust in there. ------------- GPW-17963 4/24/42 Ford F-250 Alaskan Camper Bantam T3-C #21170 |
Posted By: takesiteasy
Date Posted: 26 Sep. 2018 at 12:28am
|
Seems like the approach will be to prime, paint and wire brush/flap brush the areas to be welded. So far, no issues with flash rust. We have a nice heated shop where we can keep things dry. Hope to paint soon but life seems to get in the way all the time. |
Posted By: takesiteasy
Date Posted: 04 Oct. 2018 at 1:30am
|
Got some new springs- the pair came nicely packed in separate boxes.  |
Posted By: takesiteasy
Date Posted: 04 Oct. 2018 at 1:42am
|
We've started painting. The new floor looks great. The frame will be totally coated all sides before re-assembly. This should add significantly to the useful life to the trailer. The fenders and tub will still show their age and past use but all rust everywhere has been removed and replaced with new metal. Hope to finish painting and start reassembly this weekend.A final paint coat will be applied once the trailer is back together.  |
Posted By: mickeykelley
Date Posted: 04 Oct. 2018 at 5:05am
| Did you end up adding extra support to prevent future bed sagging? Do you know how the bed you got from MW compares to the stuff from Manila? |
Posted By: takesiteasy
Date Posted: 04 Oct. 2018 at 2:19pm
I did not add extra support. I decided to keep the trailer pretty much original. I will most likely add something like 3/4" plywood in the bed to protect the floor if I am going to put a heavy load in it. Time will tell if that was a good decision. I am super-pleased with the new floor from Midwest Military. It came bare steel oiled to prevent rust. This allowed me to use a high quality epoxy primer on it. The manufacturing quality is excellent and it fit the frame perfectly. Near as I can tell it matches the original floor specs exactly. I haven't seen the floors from MDJuan in person so I can't say how they compare. I did buy replacement tailgate support panels from MDJuan. They needed some rework to fit and the primer is of lower quality than what I am using. The steel gauge may be a bit lighter than the originals. But they did work and the result is probably better than if I had tried to repair the rusted original panels.
|
Posted By: chris insull
Date Posted: 04 Oct. 2018 at 11:47pm
|
Great progress! Looking forward to seeing the finished version!👍
------------- 1971 CJ-5 1946 T3-C S/N 30319 194? T3-C ACM 154291 (SOLD) 1967 Stevens M-416 (SOLD) |
Posted By: takesiteasy
Date Posted: 05 Oct. 2018 at 3:26am
Ha! Me too! Thanks for your comment!
|
Posted By: takesiteasy
Date Posted: 16 Oct. 2018 at 3:22am
|
It's done (well a few details yet but 99%). I'm waiting for a new data plate. Need to make a spare tire holder (ideas welcome). Need to get a tarp or make a lid. Pretty happy how it turned out. Here's some pics:          |
Posted By: takesiteasy
Date Posted: 23 Oct. 2018 at 9:48pm
|
Let the trailer out of the garage today. Picked up a nice piece of plywood to protect the new floor. Have to buy some more olive drab paint.  Also installed the new data plate. Looks good.   |
Posted By: 67charger
Date Posted: 23 Oct. 2018 at 10:00pm
| Looks good! |
Posted By: Rus Curtis
Date Posted: 23 Oct. 2018 at 11:01pm
|
Nice! ------------- Rus Curtis Alabama 1954 CJ3B Bantam T3-C |
Posted By: Gil
Date Posted: 24 Oct. 2018 at 2:14am
|
Nice looking trailer,congrats well done . Giles ------------- 1946 cj2a 59108 1998 Jeep Cherokee 2 doors 2016 Jeep Cherokee TrailHawk |
Posted By: takesiteasy
Date Posted: 24 Oct. 2018 at 2:33pm
|
Thanks for the comments! |
Posted By: Mike F
Date Posted: 24 Oct. 2018 at 3:36pm
| Yea. Makes me want one. |
Posted By: PackRat
Date Posted: 24 Oct. 2018 at 7:29pm
|
After working with the sheet metal and seeing how the floors are always "wavy", I don't think any spare tire should be affixed to the tub. If you can fabricate an "A" frame that sits on the drawbars just in front of the tub so you can still access the tarp hook I think that would be best. Make the "A" frame with extended "feet" so you can use a couple hefty bolts to attach that plate to the drawbars and don't be afraid to use some steel angle-iron for the "A" frame. To that you can weld on a repop WWII or post war spare tire mounting after you torch off most of it to keep the tire in position. You can assemble the "A" frame with a spare on it and check for where you will drill the holes in the drawbars BEFORE drilling them to insure it will fit right. ------------- GPW-17963 4/24/42 Ford F-250 Alaskan Camper Bantam T3-C #21170 |
Posted By: WeeWilly
Date Posted: 25 Oct. 2018 at 2:35am
|
You did a great job on your trailer. Another way you could do for a spare is get an wheel adapter and use your truck spare if ever needed. Jim ------------- 47 CJ2A (Ranch Hand) 48 CJ2A, 48 Willys truck, T3C 3782, M274 (Military Mule) |
Posted By: takesiteasy
Date Posted: 25 Oct. 2018 at 2:50pm
|
Well, I already have a spare, but I like that idea of a wheel adapter as a backup. I think I will mount the spare in front of the tub on the draw bars but in a way so the bracket can be easily mounted and removed without affecting the trailer. I want to leave access for the tarp hook. I've got some ideas but am going to think about it for a while before I do anything. More ideas/suggestions are welcome. Thanks everyone for all the comments, I appreciated reading them. The trailer project was a lot of work and expense but I am happy with the outcome. Feels good to have saved one of these cool trailers from the scrap yard.
|
Posted By: takesiteasy
Date Posted: 26 May 2019 at 1:21am
|
An update on the trailer project. I made a spare tire bracket and a
lid. I wrote up the whole trailer project in our blog for those that
are interested in more detail and pictures: http://travelswithrockythedog.blogspot.com/2019/05/bantam-trailer.html" rel="nofollow - http://travelswithrockythedog.blogspot.com/2019/05/bantam-trailer.html Here's a picture showing the spare tire mounted and the lid: 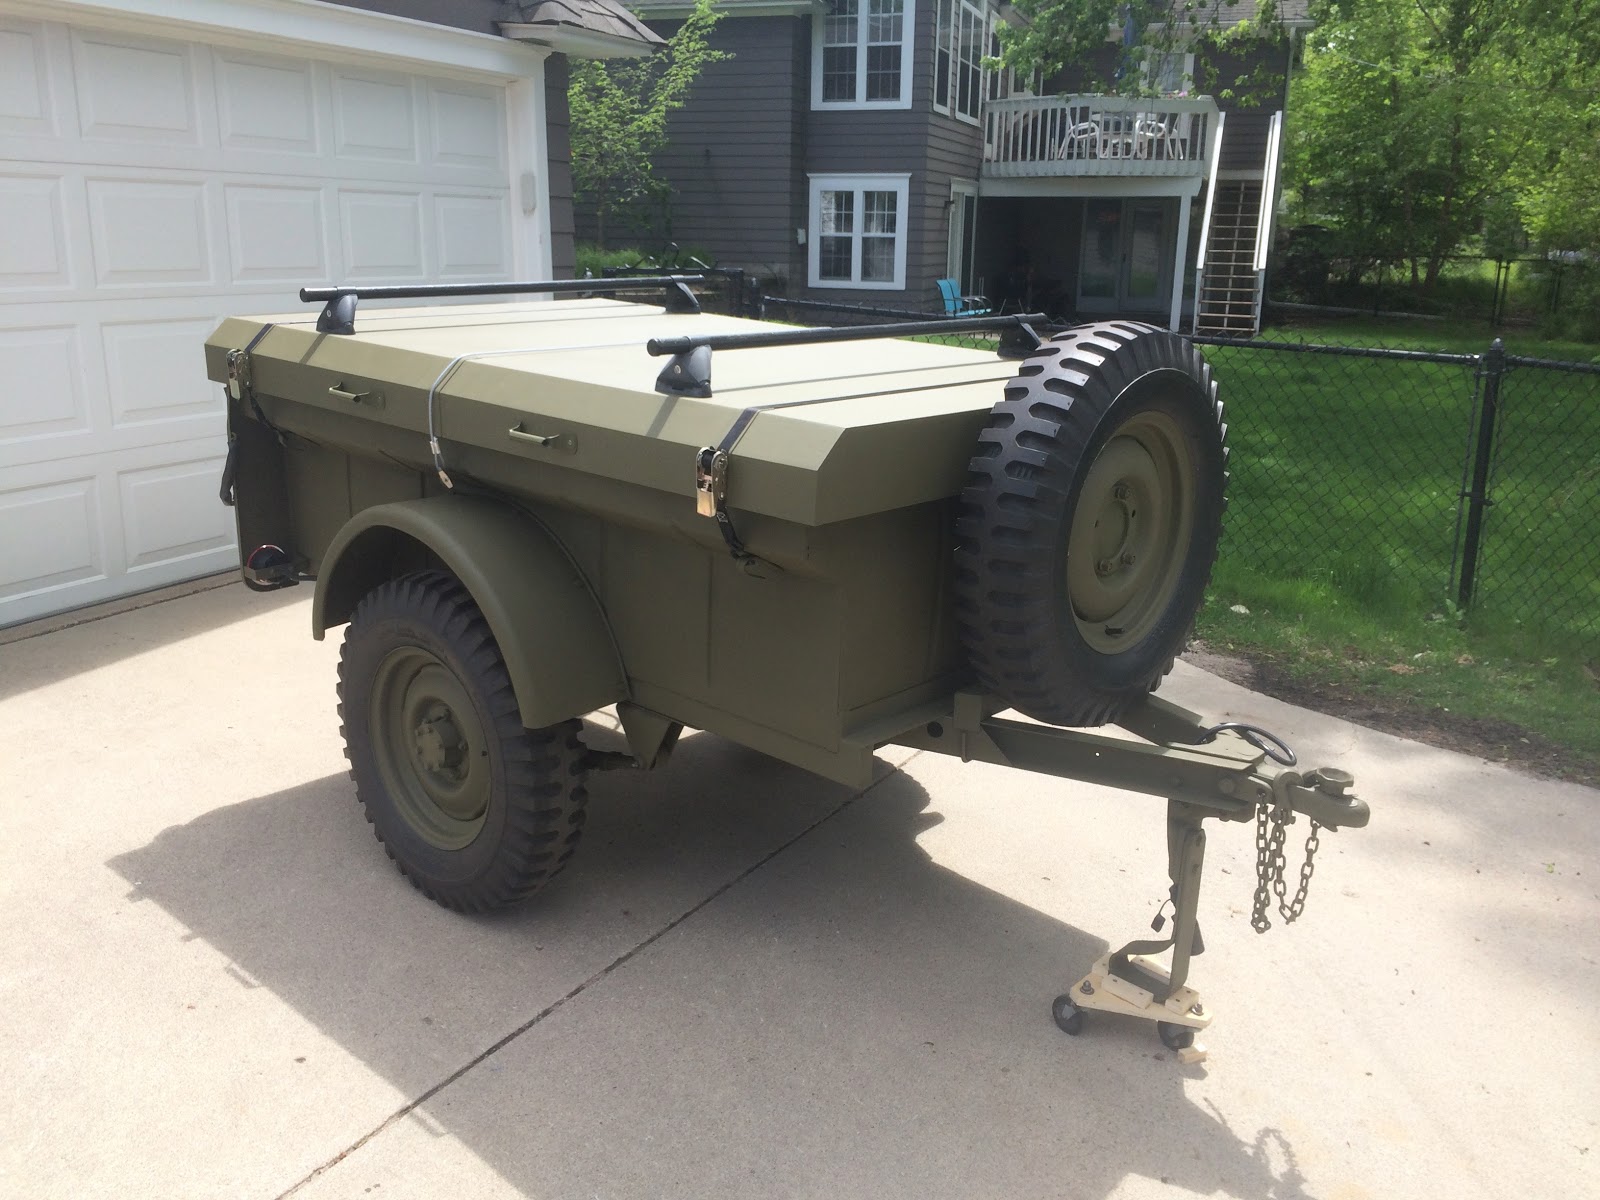 |
Posted By: canorisa
Date Posted: 27 May 2019 at 1:54pm
|
CONGRATULATIONS Sir! Very nicely done!!! ------------- Once a Marine!, Always a Marine!, Semper Fi! - Combat Wounded Vet, Desert Storm/Desert Shield - Persian Gulf 1992 E-mail: canorisa@msn.com 1940's Bantam T3-C |
Posted By: mickeykelley
Date Posted: 27 May 2019 at 5:06pm
| how is the floor holding up as far as waves? |
Posted By: takesiteasy
Date Posted: 27 May 2019 at 7:59pm
Thanks for the comment!
|
Posted By: takesiteasy
Date Posted: 27 May 2019 at 8:04pm
Floor is like new and perfect. Warms my heart when I look at it, haha. I put a piece of 5/8" plywood in to protect it. I haven't dumped any boulders in yet either.
 |
Posted By: LuzonRed47
Date Posted: 28 May 2019 at 4:51am
|
Real nice work--and the project got you into welding, an added bonus. Thanks for sharing--I'm beginning the semi-restoration of my M100 which (thankfully) came with shock absorbers as standard. ------------- CJ2A #140275 "Ziggie" (purchased new by my dad in 1947) ACM #124334 CJ3A windshield, Warn Overdrive 1953 Strick M100 trailer Serial #18253 |
Posted By: takesiteasy
Date Posted: 28 May 2019 at 12:56pm
Yeah, I enjoyed welding- wish I had learned years ago. Thanks for your comment and good luck with your M100 project.
|
Posted By: PackRat
Date Posted: 28 May 2019 at 6:39pm
|
The plywood should be painted with an oil-based primer/finish coat so it lasts with moisture getting in there. I would suggest you get some of that non-skid stuff on rolls from Lowes/Depot/Mart and install it with the ridges from side to side. That will help keep things from rolling around like a BB in a boxcar and bashing into the front panel and tailgate with constant stopping and accelerating. An option to the plywood is some of the stuff used in commercial kitchens on the floors....rubber or something with lots of holes for spilled liquids to not pool up where you need to walk...also will prevent cargo from sliding around. ------------- GPW-17963 4/24/42 Ford F-250 Alaskan Camper Bantam T3-C #21170 |
Posted By: takesiteasy
Date Posted: 29 May 2019 at 3:01am
The plywood is finished with an exterior deck stain. I have been considering getting a rubber pad to put on top of it. I did install multiple D rings around the perimeter for tie downs so I won't have things crashing around in there. Thanks for your comment.
|
Posted By: takesiteasy
Date Posted: 23 July 2019 at 5:37pm
|
After a mishap where the trailer lost its connection to the truck going over a rough railroad crossing, I made a new coupler. It was a fun project. I wrote it up in our blog- here's a link: http://travelswithrockythedog.blogspot.com/2019/07/trailer-update.html" rel="nofollow - http://travelswithrockythedog.blogspot.com/2019/07/trailer-update.html 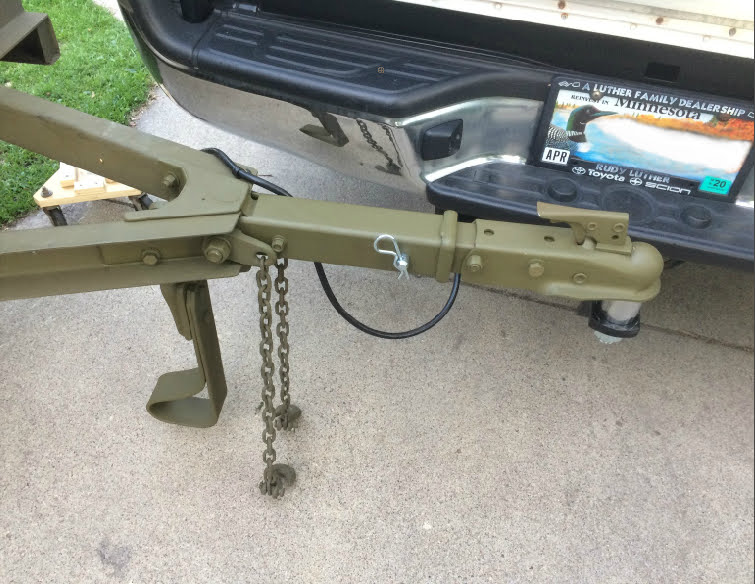 |
Posted By: mbullism
Date Posted: 23 July 2019 at 6:04pm
 Hope it was limited to a mishap! Hope it was limited to a mishap!------------- Those who do not learn from history are doomed to repeat it... Welcome to 1930's Germany |
Posted By: takesiteasy
Date Posted: 24 July 2019 at 1:05am
Yes, a minor mishap. I wrote about it in the blog. We were traveling slow going over the crossing. A big bump popped the old Fulton coupler off the ball. The trailer dropped to the pavement and landed on the part of the landing leg casting that is exposed when the leg is rotated up. It scrubbed on the pavement a bit until I realized what happened and stopped the truck.The safety chains did their job and kept the trailer from going totally rogue. I was able to weld new metal back on the casting and grind it to the original profile. Looks pretty much as good as before the accident. I think I know what happened with the Fulton and how to fix it but I decided a new coupler was a better idea for a working trailer. I kept all the parts to the Fulton so it can just bolt back on. I want to fix it first. Thanks for your comment.
|
Posted By: takesiteasy
Date Posted: 05 May 2020 at 2:37am
|
Put the trailer to work today. Picked up 2 yards of shredded hardwood mulch for the garden- one yard in the truck and one in the trailer. Nice to have the extra load capacity. I have put over 5000 miles on the trailer since completing the refurb- mostly camping trips. Still very happy with it.  |
Posted By: LuzonRed47
Date Posted: 05 May 2020 at 2:43am
|
Love your blog devoted to restoring and modifying your trailer. Good seeing it being used as intended as well as on your camping trips. The 1/4-ton jeep trailers were truly multi-purpose devices! ------------- CJ2A #140275 "Ziggie" (purchased new by my dad in 1947) ACM #124334 CJ3A windshield, Warn Overdrive 1953 Strick M100 trailer Serial #18253 |
Posted By: takesiteasy
Date Posted: 05 May 2020 at 11:37pm
Thanks for your comment on the blog. And yes, these trailers are very useful. I love mine.
|
Posted By: mickeykelley
Date Posted: 06 May 2020 at 12:29am
| So my same question as before, now after 5,000 miles, how tge floor holding up? |
Posted By: takesiteasy
Date Posted: 06 May 2020 at 2:10am
Floor is fine. I have a piece of plywood over it to protect it- is
working well. There are some wear spots in the paint but otherwise good.
No sags. One problem- the floor is not welded continuously to the side walls and there are small gaps in spots. I noticed after hauling mulch that dust works down in there and gets stuck. I need to wash
or vacuum that out. Overall, really glad I replaced the floor. |
Posted By: WeeWilly
Date Posted: 06 May 2020 at 2:46am
|
Could you use a automotive seam filler to seal those gaps? You might even be able to find a color to match. Jim
------------- 47 CJ2A (Ranch Hand) 48 CJ2A, 48 Willys truck, T3C 3782, M274 (Military Mule) |
Posted By: takesiteasy
Date Posted: 06 May 2020 at 4:41am
Thanks for the suggestion. I was thinking about that too. It would have to be pretty flexible but also durable to resist abrasion. I don't have experience with those products to know which would work well.
|
Posted By: WeeWilly
Date Posted: 06 May 2020 at 3:17pm
|
Butyl caulk is a flexible tough rubber sealant that is used for exterior applications like rain gutter, vinyl siding to brick etc. You can get it at Lowes, Home depot, most hardware stores. For a large color selection it would be better to go to a place that sells mostly roofing and siding. I believe it is the same stuff that is used on vehicles. Jim
------------- 47 CJ2A (Ranch Hand) 48 CJ2A, 48 Willys truck, T3C 3782, M274 (Military Mule) |
Posted By: takesiteasy
Date Posted: 06 May 2020 at 11:54pm
| Thanks for the suggestion. |
Posted By: takesiteasy
Date Posted: 15 Aug. 2020 at 4:39pm
|
Exploring the Superior National Forest this week: 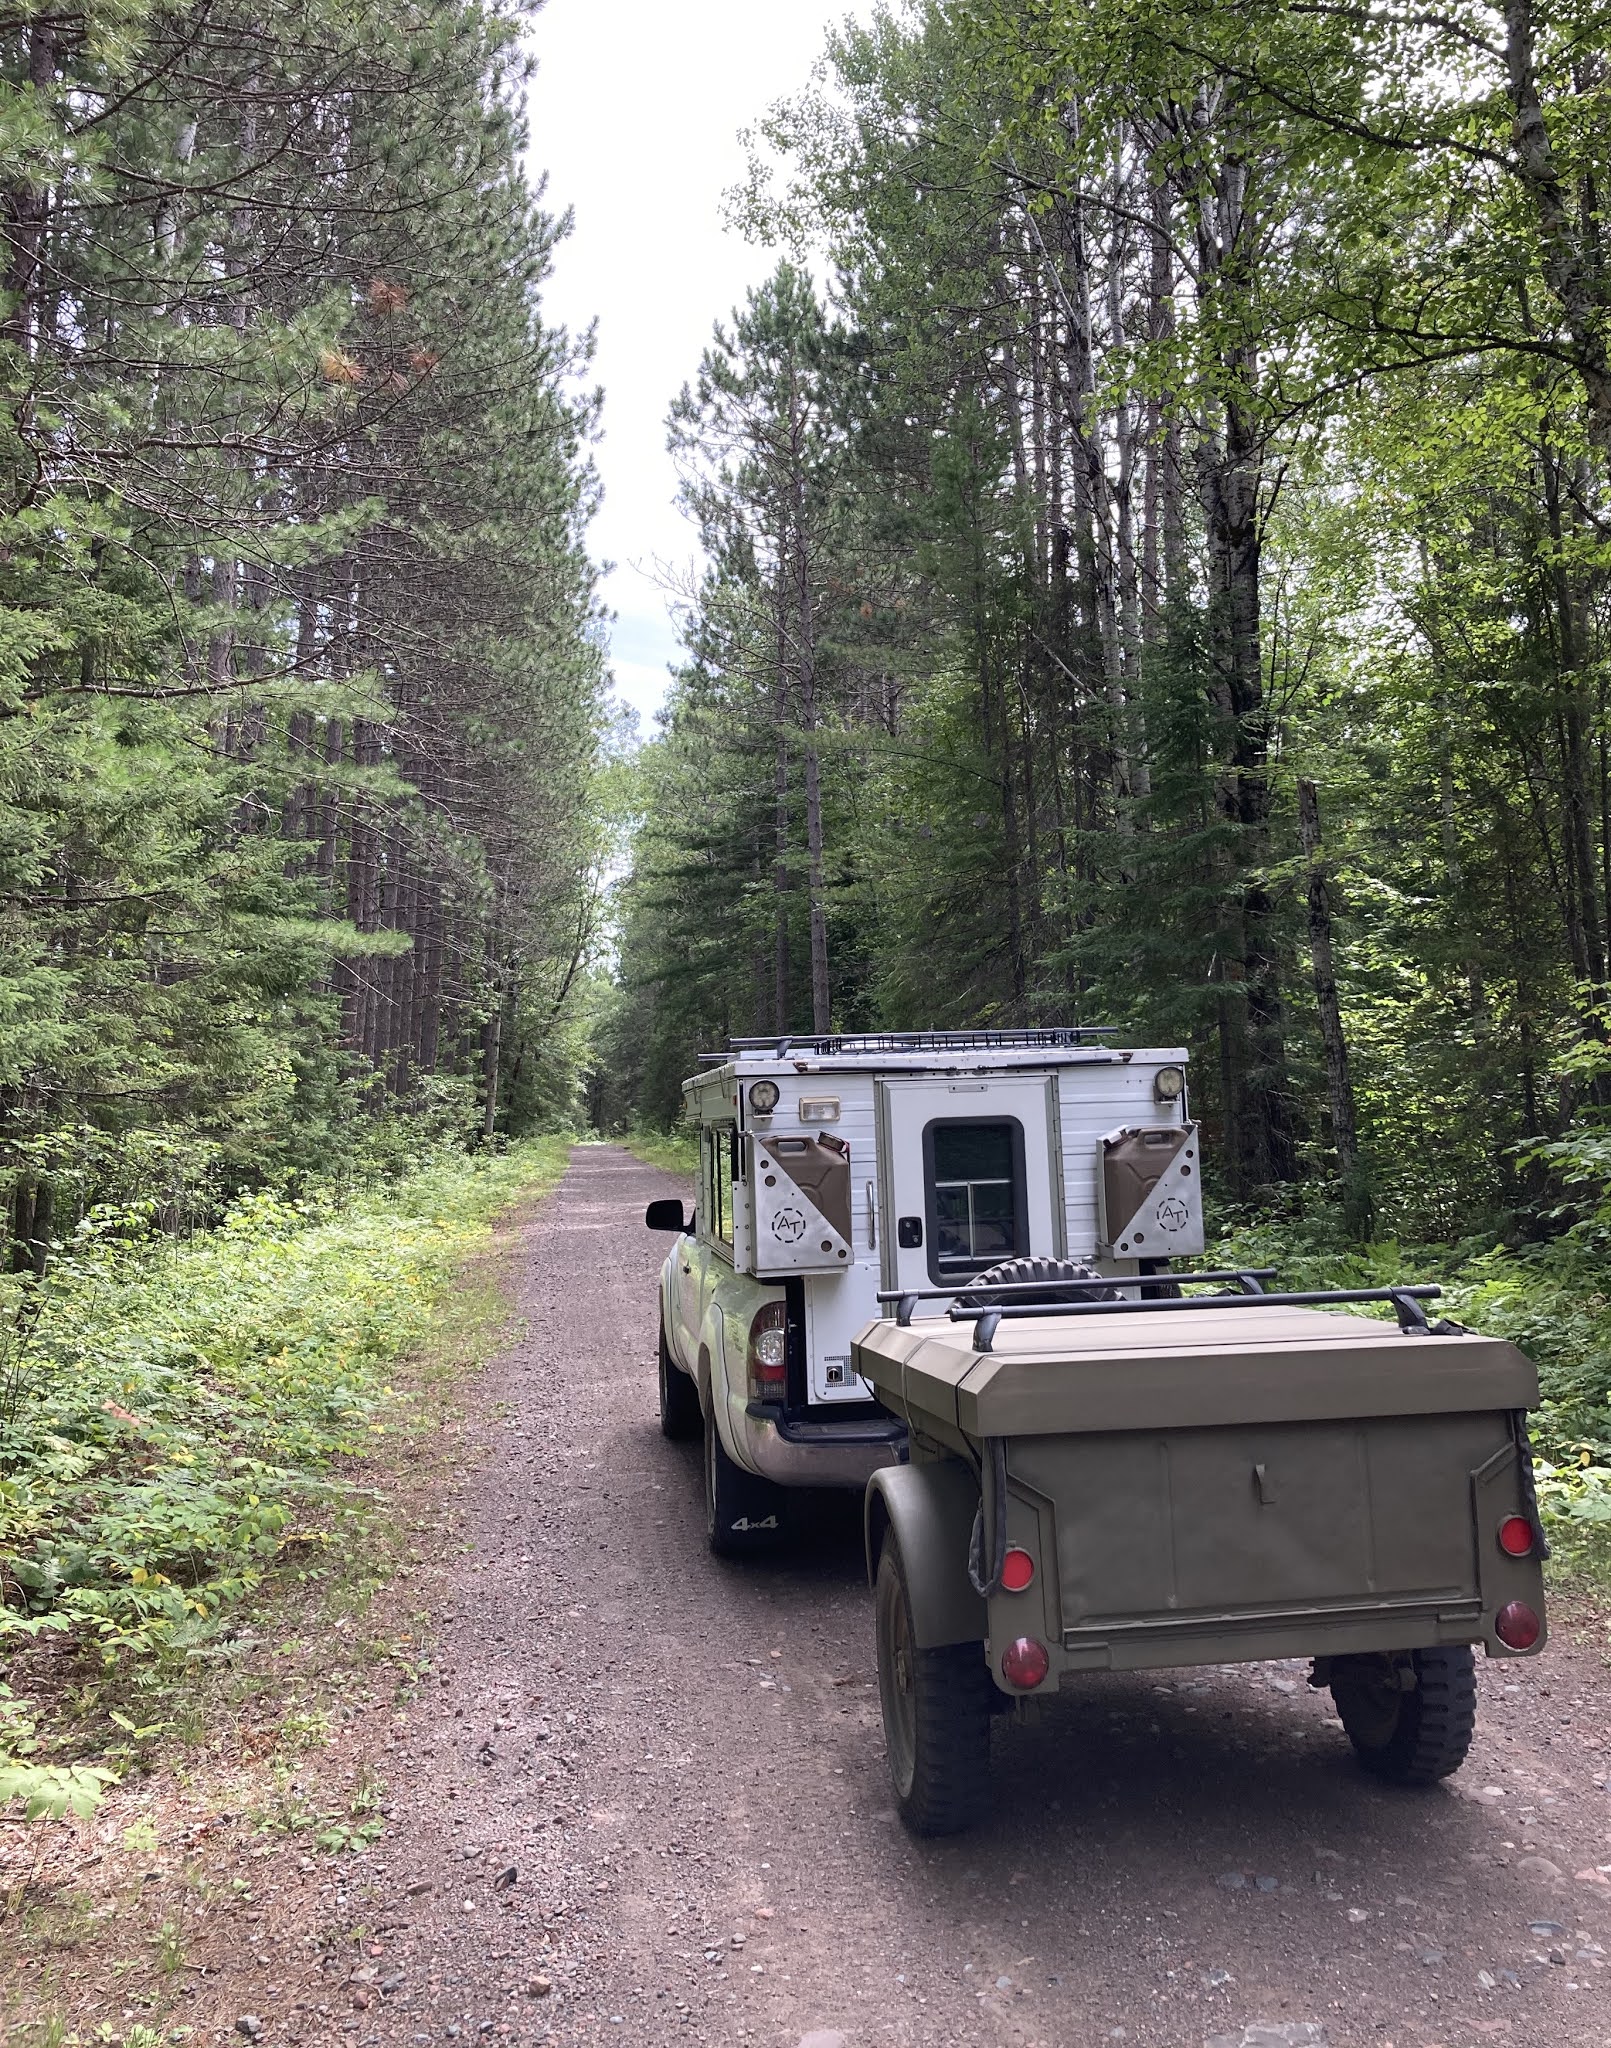 |
Posted By: Batjac65
Date Posted: 15 Aug. 2020 at 9:35pm
|
Nice! Looks good behind your camper rig. ------------- 1946 CJ2A #75375 |
Posted By: LuzonRed47
Date Posted: 17 Aug. 2020 at 1:27am
|
Cool photo, that forest is beautiful. I like the jerry-can holders on the back of your camper. ------------- CJ2A #140275 "Ziggie" (purchased new by my dad in 1947) ACM #124334 CJ3A windshield, Warn Overdrive 1953 Strick M100 trailer Serial #18253 |
Posted By: takesiteasy
Date Posted: 18 Aug. 2020 at 12:09am
Thanks for the comment. The trailer is a great camping companion.
|
Posted By: takesiteasy
Date Posted: 18 Aug. 2020 at 12:11am
The Tacoma has a pretty limited range so it helps to carry extra fuel, especially when we are in areas with no services. Thanks for the comment.
|
Posted By: MarkCHI
Date Posted: 28 Oct. 2020 at 10:38pm
do you have any contact details for the company that made the floor?
|
Posted By: takesiteasy
Date Posted: 28 Oct. 2020 at 11:04pm
|
[/QUOTE]
do you have any contact details for the company that made the floor? [/QUOTE] Here's a link to the part: https://store.midwestmilitary.com/product-p/mwm231.htm" rel="nofollow - https://store.midwestmilitary.com/product-p/mwm231.htm I highly recommend the company- high quality and good service.
|
Posted By: takesiteasy
Date Posted: 11 Nov. 2020 at 3:12am
|
I added an ammo can to the draw bars of the trailer to store tie down straps, chocks and what not. I fabricated some concealed clamps to attach the can to the draw bars so no alteration to the trailer.  Camping was diminished this summer due to Covid 19 but we did take a couple of trips. Here is our camp in the U.P of Michigan on Lake Superior. The trailer has become a valued part of our camping set-up.  |
Posted By: LuzonRed47
Date Posted: 11 Nov. 2020 at 3:20am
|
Very cool rig and love the restoration and evolution of your Bantam TC3. Thanks for sharing. ------------- CJ2A #140275 "Ziggie" (purchased new by my dad in 1947) ACM #124334 CJ3A windshield, Warn Overdrive 1953 Strick M100 trailer Serial #18253 |
Posted By: takesiteasy
Date Posted: 12 Nov. 2020 at 1:32am
Thanks for your comments. How's that M100 project coming along?
|
Posted By: mickeykelley
Date Posted: 02 Apr. 2022 at 10:05pm
|
After your comments on the floor from Midwest military, I have decided to go with his. Right now freight is a killer, but we are making a trip to see daughter in Milwaukee so I’m taking the opportunity to do a few detours on the way to pick several items to avoid freight and thus pay for trip, one of which is the floor from John. I’m hoping to start the process this summer. In the mean time, we will be taking it camping in June so gotta get the tailgate attached with the hinges I got, bearings gone thru, etc. then later this summer cut out the old floor and move forward. I see you ended up going flat od green. How is it holding up?
|
Posted By: takesiteasy
Date Posted: 02 Apr. 2022 at 10:45pm
Very happy with the paint. It hides defects really well. I bought
the 2-part urethane paint from Midwest Military and several rattle cans
of matching paint for touch-ups as needed. That is working out well. Good luck with your project.
|
Posted By: mickeykelley
Date Posted: 02 Apr. 2022 at 11:15pm
|
I’ve been kicking around that exact thing about just tack welding the the hinges to the trailer for this trip. Tubby definitely needs some hiding his past as the PO created a bottom flip open like a dump truck and I found quite a few small rocks in it and some bowing in the sides. So I’m guessing he had a pretty hard life before me. I’m just not sure on the color yet. Originally I was going to go Presidential Red to match my CJ5 but then the shinny will really accentuate the bumps and bruises.
|
Posted By: mickeykelley
Date Posted: 10 Apr. 2022 at 9:45am
What size bolt did you go with?
|
Posted By: takesiteasy
Date Posted: 10 Apr. 2022 at 10:20am
|
I'm not sure what bolt you are asking about. Here is a crude drawing of the tab that I made with some dimensions:  |