


|
|
|
'48 # 150870 resto/semi GPW clone |
Post Reply 
|
Page 12> |
| Author | |
hooptytank 
Member 
Joined: 12 Feb. 2012 Location: Santa Monica,CA Status: Offline Points: 22 |
 Post Options Post Options
") Thanks(0) Thanks(0)
 Quote Reply Quote Reply
 Topic: '48 # 150870 resto/semi GPW clone Topic: '48 # 150870 resto/semi GPW clonePosted: 04 Mar. 2014 at 11:26am |
|
2 years have passed since we've completed the restoration, and everything is still working great with no issues. We try to drive it twice a month or so, and luckily for us in So California we still can do so year round with no top. I want to thank all that have contributed to this site. It is a wealth of information no manual will ever cover.
Unfortunately time has come for our CJ to be enjoyed by someone else and it is up for sale. I will post a link to the craigslist ad in the for sale section. |
|
 |
|
|
jpet
Moderator Group 
Sponsor Member x 5 Joined: 30 Apr. 2008 Location: Ramsey, IL Status: Offline Points: 11173 |
Post Options
Thanks(0)
Quote Reply
Posted: 14 Feb. 2012 at 7:15pm |
|
That is some good work you are doing there.
 Bet that jeep has a lot of spark with two ignition coils. Bet that jeep has a lot of spark with two ignition coils. Here is a previous discussion on Military jeep markings
|
|
|
CJ2A #29110 "General Willys"
MB #204827 "BAM BAM" "We do what we can, and we try what we can't" |
|
|
|
|
Scott R
Member
Joined: 16 Mar. 2007 Location: Gaines, MI Status: Offline Points: 1392 |
Post Options
Thanks(0)
Quote Reply
Posted: 14 Feb. 2012 at 1:20pm |
|
I made stencils using Corel Draw and your welcome to the file. It's not an elaborate file by any means. I simply used 3" Gothic or as Corel more specifically calls "Gothic725 Bd BT" for the hood and bumper lettering. Then made three different size stars... A 20", a 6", and a 3" (for the bumper).
Also have a file for the shipping data somewhere but not sure what happened to it at this point. Will take some searching my files if you want that one. One little caveat.... I've seen all sorts of different fonts and sizes used and I didn't study the subject in depth enough to say the size or font I used is "correct". I suggest some reading over on the G503 site which is where I did my research. http://www.g503.com/ Now with all that said... If my jeep was as nice as yours is I would just use one of the services available that makes vinyl stencils for vintage military vehicles. I don't have any links for you but should be easy enough of a find with a search over on the G503.
|
|
|
|
|
Oilleaker1
Member
Joined: 06 Sep. 2011 Location: Black Hills, SD Status: Offline Points: 4411 |
Post Options
Thanks(0)
Quote Reply
Posted: 14 Feb. 2012 at 12:54pm |
|
Home repair center! You guys are handy and I'm impressed at the way you both are working together at it. I never knew about that type of spin-on filter with the bypass hole. The only danger is someone else putting the wrong filter on-------ouch. Now that you are on a roll, the next question is: what is the next project going to be?
|
|
|
Green Disease, Jeeps, Old Iron!
|
|
|
|
|
hooptytank
Member
Joined: 12 Feb. 2012 Location: Santa Monica,CA Status: Offline Points: 22 |
Post Options
Thanks(0)
Quote Reply
Posted: 14 Feb. 2012 at 9:35am |
|
Getting close to the end now. Some more bits of miscellaneous assembly steps.
Some detail pics of the windshield hardware, installing new support arm hinge bolts and spring washers from Walcks. Nice stuff  New star spring washers and T bolts, also rubber bumpers for the windshield stops  Successfully mounted striker plate and latch  Latches. The flat blade screw shown there is in one of the 4 holes I had to redrill  Hinge and hardware  No hood welting rivet pliers? no problem, just use a trusty tile notcher. Not ideal, but gets the job done.  Leather hole punch pliers, used to punch holes in the welting.  Fenders mounted  Grill mounted and parking light lenses  Nice hood blocks I got from Herm, came with mounting hardware.  Seats, steering wheel, shift knobs and grab handles installed. The upholstery is actually nice, no tears, so I just cleaned and reused it  Soon I'll fabricate a spare tire and Jerry can carrier to mount to the rear. Nothing will be bolted to tailgate.  Aside from that, I need to install the outside rear view mirror, and black out lamp. Unfortunately I didn't drill these holes before painting, so I need to do it carefully. I also want to stencil some army markings, stars, serial #, shipping data, tire pressure, etc, but I want to give the paint a few more weeks to cure. I might have a buddy do some photoshop work, then have stencil stickers made, or just stickers. not sure yet. Does anyone have access to pre made files or any helpful links to making stencils with the right font, size, etc? |
|
|
|
|
hooptytank
Member
Joined: 12 Feb. 2012 Location: Santa Monica,CA Status: Offline Points: 22 |
Post Options
Thanks(0)
Quote Reply
Posted: 14 Feb. 2012 at 7:47am |
|
I'll go over some small tidbits, and some Homer D-OH!! moments
let nothing go to waste. this was one of the lower fender brackets that attach to the frame. it broke off while on the car, and I misplaced it one of the hundred ziplock bags of parts and bolts for some time. Then thankfully I found it... the day after I already fabricated and welded a new one on.  Then I realized that even though I had a new parking brake return spring, I was missing 2 pieces: the tab that mounts on the clevis pin and the wire that mounts to the tub bracket. Using a picture found on this site and a taking a stab in the dark,  Then using a piece of remaining choke cable, I made the wire hook thingy.  Cable mounting FAIL!  There ya go! Thanks To the one who posted all the info on this little piece!  Seat frames cleaned  and painted  Practicing scribing circles on rubber sheet  Making sense now  Gotta make sure it's sealed tight, so the fire can stay on the other side of the wall  Here's a great example of the many uses of finish nails. grind the sharp point down a little, grind the head down a little. the rest should be self explanatory. The importance of a successful restoration "hinges" on using the resources at hand.  Managed not to loose any brackets, or critical bolts during this whole painting ordeal. I went through about 14 cans of VHT roll bar epoxy paint for all the little stuff and big stuff like axles, springs shocks and driveshafts. Lesson learned, buy a case! It will save you some $ Another reason is when the paint comes from the same batch it will have the same finish. If you don't believe me, look at the picture of the engine and trans on the hoist, going into the chassis. the engine trans and t/case are grey, right? look closely and you'll notice 2 different shades of grey between the engine and trans. Even though it's the same part # of ford grey, but bought at different times.  Closing off this section, here's a couple D-OH! moments. trying to save a buck I didn't change the water pump when reassembling the engine. It was a practice run... I was a little bent, so I let my buddy swap it out   Here you can see how to precision drill holes in a tube, which have been welded, smoothed and painted over. The key here is to guess the center of the weld within a few thousands, then proceed to wear out a drill bit trying to cut through weld. Had to do 4 of these for the pop out windshield latch striker plate and the top screws for the windshield to cowl latch You notice the glass is installed. i had 2 new panes cut and installed for 100 bucks. I was planning to use the the old delaminating glass, just because I wanted that "patina". Bought a fresh set of rubber gaskets and proceeded to attempt installation. The frame is original and same glass that came out of said frame was going back in, channels were clean and I made sure I didn't overload them with paint. Soapy water, baby powder, prayers to the glass gods and multiple censored words later I was the owner of about 80 pieces of glass. One large piece, and about 79 smaller ones. Luckily the one that shattered was an old replacement piece. The one that survived was the original glass with the L-O-F logo. Picture below is borrowed from another post on this forum and shows the same mark I have on my surviving piece. Speaking with the seller, the reply was I've never heard about any problems with those channel seals. Funny, I found several people with issues on this forum. Then it was casually mentioned that I should use packing tape instead of the seal. Really, where do I get that? Apparently Glass shops use it, and is what "should" be used for this purpose was the reply. Never heard of any problems, yet packing tape is recommended, but still the gasket that doesn't fit is being sold.   |
|
|
|
|
hooptytank
Member
Joined: 12 Feb. 2012 Location: Santa Monica,CA Status: Offline Points: 22 |
Post Options
Thanks(0)
Quote Reply
Posted: 14 Feb. 2012 at 4:57am |
|
I wanted to try to rebuild the existing running light sockets. the phenolic washer on the back was cracked and fell apart.
 luckily I live near a good surplus shop where I can find all kinds of weird hardware. U found some phenolic washers the right size and cut 3 grooves for the crimp tabs  Got close to finishing one  then, when folding the crimps back, the washer cracked  Walcks has these new, so I ordered up a pair along with some other stuff.   Finished off the harness with some shrink wrap and the old school asphalt loom.  Original junction block  Refurbed block with terminated wires    Fresh wires all the way to the light connector  After all this, we have lights!   Even the high beam indicator functions. It had several coats of paint I had to carefully remove as not to damage the lens.  At this point it's running, its mostly assembled. I'll cover some other small details on the windshield assembly, breaking glass, cursing the repop gasket, and some other small details. I took it for a good 40 mile drive today, It rattles less than the first time I drove it, and it doesn't pop out of 2nd. Must've done one thing right |
|
|
|
|
hooptytank
Member
Joined: 12 Feb. 2012 Location: Santa Monica,CA Status: Offline Points: 22 |
Post Options
Thanks(0)
Quote Reply
Posted: 14 Feb. 2012 at 3:11am |
|
Yup, 6 weeks full time, close to 10 hour days, including weekends. Would have been 10 weeks if not for this site. The amount of information I learned here by searching thecj2apage through google has been amazing. Thanks to all who have contributed to all the various articles, posting links, etc.
Now that the body is on, time to wire. I like to keep all the smoke inside the harness, so I rewired the whole thing. The head light and brake/running lights were still original wires, but missing about 1/2 the insulation. It was the simplest wiring job to date, but still took about a day and a half. I used remnants from previous wiring jobs and used 70's GM colors, since its familiar to me and the wires I had left were premarked for the various circuits and were in those colors. I "styled" it after the stock wiring configuration with a few minor exceptions. I still have the dash mounted 6v keyed coil, but it only serves as a on off switch. I ran the coil, fuel gauge and the starter solenoid power through the switch. I didn't want people pushing buttons and accidentally bumping the starter. if it's in gear you could see the potential problems. As far as starter switches, the PO installed a dash mounted pushbutton, I kept that for Dad, since he liked it, and I also wired the original foot switch for my preference. so either one will activate the solenoid when the key is on. The horn got a dedicated relay and the light circuit remained in stock configuration. Started off with making the main battery cable, 3 feet of 2 ga.  Wired the coil, dist, solenoid and alternator charging wire  Finalized this wide of the harness  installed and wired the gauges. I placed the oil and water at the top, since i believe these to be more critical, and are easier to read higher up  Amp gauge  horn relay and circuit breaker ( I actually left this alone from the PO, but moved under dash from underhood to keep the engine bay clean)   Jeeps are a pain in the back to work under the dash, literally  Madness  Made headlight harness. I also ran a few extra wires in there, that will be tucked away for whatever future use.  cleaned headlight switch  Crimping and soldering  Those extra wires tucked away, they are not connected to anything, just inside the harness that goes through the firewall and is shrink wrapped. the idea is that if ever I need wires, I won't have loose oddball wires outside the harness  Installed all firewall grommets and cables  Stainless braided -3 oil pressure hose on left and lights/horn/spares harness. once the harness is routed i shrink wrapped the whole thing and adel clamped in place.  Fuel sender wire  Sending unit fiasco... ordered a new sending unit, but didn't read right with the SW gauge installed. It ohmed out to willys spec 0-130 I think. through some trials and using another boat tank sender I had, I figured the gauge is calibrated for a 33-240 ohm sender. It also appears that standard universal tank sending units have the same bolt pattern as the Willys tank!!! ran down to West Marine and picked up a universal 33-240 ohm sending unit.  bent the arm and cut to fit the tank, and installed with new gasket and new sealing screws that came with the unit. Worked good for a bit, but i need to add a separate ground since its become intermittent.  Edited by hooptytank - 14 Feb. 2012 at 4:10am |
|
|
|
|
Scott R
Member
Joined: 16 Mar. 2007 Location: Gaines, MI Status: Offline Points: 1392 |
Post Options
Thanks(0)
Quote Reply
Posted: 14 Feb. 2012 at 2:19am |
|
Hey I've done a few of those "practice flares" myself before installing the fitting.
 Great story to read. Looking forward to reading more.
|
|
|
|
|
ralf
Member

Sponsor Member x 2 Joined: 06 May 2008 Location: Fayetteville WV Status: Offline Points: 4861 |
Post Options
Thanks(0)
Quote Reply
Posted: 13 Feb. 2012 at 11:37pm |
|
6 weeks!!!!!
Thanks for the tip on double flaring brake line. Now I get it, put the fitting on before you flare.
|
|
|
1947 CJ2A
1948 CJ2A 1953 Ford NAA Golden Jubilee Tractor 1941 J-3 Cub 1957 Farmall Cub Low Boy tractor 1942 Clarktor WW2 tug |
|
|
|
|
hooptytank
Member
Joined: 12 Feb. 2012 Location: Santa Monica,CA Status: Offline Points: 22 |
Post Options
Thanks(0)
Quote Reply
Posted: 13 Feb. 2012 at 8:49pm |
|
Hammer time! not some 90's rap song, but time to bang out some dents. The body was fairly straight and had little rust compared to some other peoples projects on this forum. I dislike doing body work with a passion, yet every second I reminded myself of the hundreds of CJ2A owners that need to deal with rotted out panels and months or years of work to get them to proper condition. I salute you gents! One user, I forget his name mentioned that he removed 2 or 3 layers of various sheetmetal in search of the original bed floor, and in the end had a very nice view of the ground. That is classic.
Like I mentioned before, We took the body back from the body shop that sat on it, doing nothing. The thing that angered me the most is that the body had just been blasted, and etch primed. It already was starting to show surface rust. With the body safe at home out of their hands, for around 60 bucks at HF I became a body man.  First order of business was to fill in holes, patch up some small sections, remove the top bow storage and mounts, and beat the 2 inch deep valley in the bed floor somewhat straight.  above: Nice hidden rust behind those rear bow brackets. The pieces I took off are in great shape, and kept them, I might sell them off if there's interest. Below. I guess the original heater knockouts weren't enough for, had to go and drill another hole...  For the sunk bed floor, I had to do a lot of metal shrinking using heat, repeated blows with a 4 lb sledge and rapid cooling, I worked from the outsides to the center. To do this properly you need an Oxy acetylene torch, but all I had was propane. I would heat a section, then strike a piece of 3x3/8 cold rolled flat stock in various positions to persuade it back to it's original shape, then cool with a wet rag, repeat for a few hours. I concentrated on beating the backside of the ribs, and the flat sections followed. Then a body hammer and dolly to remove some of the remaining dings. It is far from perfect, but it could have been done perfect. It's much better than before. I also used this shrinking method on a couple of high spots on the tub panels.  used 3/4 of a gal of filler on the body, but about 5/8 of it was sanded off. The panels were very straight for it's age.   Paint booth set up and ready for primer   It's like a member of the family, even gets it own room  I used this vintage gun to shoot the primer as it had a large orifice. the parts list is dated Dec 1950! But I think I was the first to ever use it!  Sanded the primer with 180, 220, and 320 dry. Here I want to chime in on sandpaper. 3M products are worth their price. Paint booth obstacle course, this was too many and too close together. It turned out OK though    Almost there 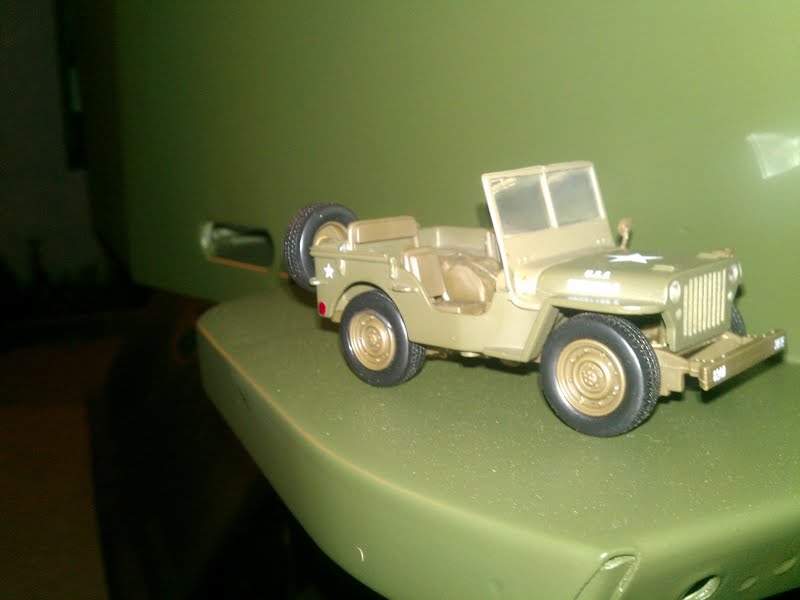 For the paint I used Kustom Shop Hot Rod Flats Olive Drab 235. It painted ok, but now that it's dry it seems like its easily scratched. not sure if I didn't mix it right or what, but the surface prep was perfect. Time will tell Mounted up some data plates and prepping to drop onto the chassis.   This is how I dealt with the steering box, Insert through hole, and laid it on the floor until the body was installed.  Almost forgot some safety wire  Some protection against scratches  At this point the engine has been ran, brakes, bled, shifted through all the gears and 4wd ranges. I also ran new wires to the brake light. Next is a one man operation of dropping the tub on the chassis. actually 3 is a good number, not too many to make it confusing, not too few to make it cumbersome. Later on will cover electrical and final assembly |
|
|
|
|
hooptytank
Member
Joined: 12 Feb. 2012 Location: Santa Monica,CA Status: Offline Points: 22 |
Post Options
Thanks(0)
Quote Reply
Posted: 13 Feb. 2012 at 7:31pm |
|
Thanks for the compliments, it's been a steep yet fun learning curve.
The oil filter is a Napa 1050, bypass type oil filter. Check out that restrictor plate, tiny little hole. The oil pressure is 15 at a hot idle and goes up from there. The PO actually told me about it.  I wanted to make the engine a full flow system, drill and tap the block and oil pump on the outlet side, and block off the inner passage, and run -6 hoses. Someone on another forum did it, here's the link: http://www.earlycj5.com/forums/showthread.php?68239-full-flow-oil-filter-for-f-134. This would have accomplished 2 positive things in my opinion: *efficiently filter all the oil before it reaches the main oil galley *eliminate the oil pressure drop at the #1 main In the end decided to leave well enough alone. Edited by hooptytank - 13 Feb. 2012 at 8:51pm |
|
|
|
|
Oilleaker1
Member
Joined: 06 Sep. 2011 Location: Black Hills, SD Status: Offline Points: 4411 |
Post Options
Thanks(0)
Quote Reply
Posted: 13 Feb. 2012 at 1:12pm |
|
Great story and pictures. The only thing that bothered me was the picture of the spin on oil filter. You say you have driven it. Did the oil pressure look good? Add-on spin- on oil filter assemblies don't usually have the orifice to provide resistence that maintains oil pressure. The old canister stem that the cartridge slides down on has this orifice in the side that I'm talking about. This orifice, the inner plugs, and front oil sprayer for the gears are important for oil pressure. The picture up high on the bluff was fantastic also! John
|
|
|
Green Disease, Jeeps, Old Iron!
|
|
|
|
|
Joe DeYoung
Member

Sponsor Member x 2 Joined: 20 July 2005 Location: Madison WI Status: Offline Points: 3358 |
Post Options
Thanks(0)
Quote Reply
Posted: 13 Feb. 2012 at 11:37am |
|
Nice build thread Love all the pics. That's a lot accomplished in 6 weeks. |
|
|
Joe DeYoung
to many jeeps, parts, and accessories to list here, but apparently enough to keep me in trouble with my wife. |
|
|
|
|
hooptytank
Member
Joined: 12 Feb. 2012 Location: Santa Monica,CA Status: Offline Points: 22 |
Post Options
Thanks(0)
Quote Reply
Posted: 13 Feb. 2012 at 10:05am |
|
I'd like to report that we drove it today, technically yesterday, for the 1st time since the teardown began, without any surprises. It's been exactly 2 months since we bought it and about 6 weeks in the build process, way past deadline and over budget.
 Feel free to chime in opinions, questions, suggestions and whatever else you feel like. |
|
|
|
|
hooptytank
Member
Joined: 12 Feb. 2012 Location: Santa Monica,CA Status: Offline Points: 22 |
Post Options
Thanks(0)
Quote Reply
Posted: 13 Feb. 2012 at 8:47am |
|
With the chassis rolling, and brake plumbing mostly out of the way, time to drop the powertrain in and start the reconstruction of the chassis. then the body work shall commence.
 Engine stay cable, or whatever it's called. I've read all kinds of arguments about its' intendend function. I'll go with the reduce clutch chatter theory, due to the clutch linkage relationship to the trans on this truck. End of story, I'm sticking to it.  Assembly line nut thread chasing. These are the u-joint nuts  I also disassembled the driveshafts, including the u-joints to clean, inspect and prep for paint. I believe these to be the original ones, with cork gaskets for the cups and are stamped "SPICER USA" on the caps. all were in great condition.   I had to drill and tap the starter support out to 3/8, since the old hole had no threads left to chase  Critical ground strap  I found the original battery ground cable stuffed in the corner with a rats nest, cleaned up with a new bolt and ready to go!  Dist all cleaned up, sporting an auto-lite cap. is it possible this is original? the spark plug wires were solid core, so who knows when this got it's last tuneup.  Making new AN -4 oil lines to compliment the ARP studs.  I routed the feed side under the water pump for better fit with the stainless hose. also put on a -6 cap for the block drain.  Hope it clears the fuel pump  Some minor trimming required, but it fits.  Made a new alternator bracket from one I had from something else to replace the POs monstrosity. I think one of the two brackets is the original generator bracket...  Dinner's ready, the VHT manifold paint calls for a curing process of multiple heating and cooling cycles.  PCV valve plumbed, carb installed and plumbed  Recored radiator installed. I added a filter to catch all the scale floating around in the block that I couldn't remove. that will come off after a few water changes.  I had remnants from a MSD wire set and plenty of connectors, so why not? New wires on the way  finished and looking good from something I was about to throw away. The air filter bracket had to be drilled out 1/4 " bigger and a new grommet installed to fit the 8.5mm wires. This will easily gain me 0.6 horsepower. also check out the starter solenoid mounting. I used 3/8 copper tube, beat it flat drilled some holes, made some bends and covered some of the exposed metal with shrink wrap. Finally I chose to mount the coil on the engine instead of under the dash, to help clean up some clutter.  V Edited by hooptytank - 13 Feb. 2012 at 9:28am |
|
|
|
|
hooptytank
Member
Joined: 12 Feb. 2012 Location: Santa Monica,CA Status: Offline Points: 22 |
Post Options
Thanks(0)
Quote Reply
Posted: 13 Feb. 2012 at 8:09am |
|
Some steering components to start. wanted to rebuild the steering box. The parts I received were garbage. The new races had these machining ridges in them that must have been .005 deep. no way I was using these as in 100 miles when the ridges wore down I'd have all kinds of slop in the worm shaft. All I used from the kit was the sector shaft seal. old bearings and races looked ok, I just took out a .003 shim from the original stack to tighten things up. The gearbox will be installed with the body to ease alignment.
 I removed the steering tube bearing, cleaned it and packed it with grease.  the draglink repair kit was another disaster. The new races or bushings or pills, or whatever they are called, looks like they were made on the same junk equipment as the steering box bearing races. additionally, these had a raised point in the valley of the concave portion, so your bellcrank or sector shaft balls will be riding on spikes, instead of a smooth concave surface. Nothing from this kit was used, not even the "seals" which are actually cardboard, not rubber. made my own from an old inner tube. 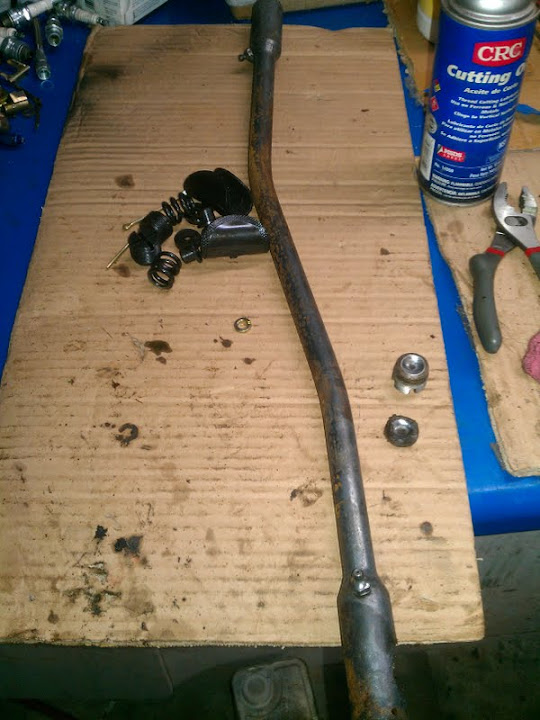 Take a box of pained suspension parts, covered in a film of former rusty parts wire wheel dust,  Add a frame and a couple of axles  Some clean shakcles with new 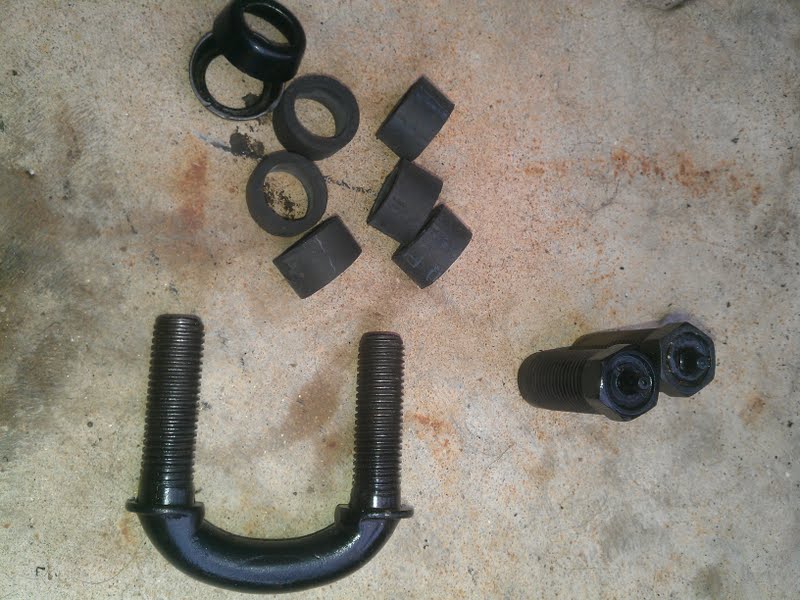 and you have a rolling chassis cocktail! Enjoy responsibly.  You may notice the tie rod is a one piece deal, it's the same as on more modern 4x4 trucks and reduces or eliminates the death wobble, now you only need to live with bump steer... I'm going to cover installing the new bellcrank pin, another marvel of Indian and Chinese engineering. While the diameter the bearings ride on is .750" as it should be, the locking pin groove is .032 shallower than the original, so the locking pin will not go through both holes in the frame. That is 1/16" ! how can you machine something so far off from original and call it good? Took a cutoff wheel and ground down some, then used a small file to finish it smooth. At least the bearings were genuine Torrington bearings, But I don't feel right about this pin situation.   Going to be reusing the vintage Rod Hall edition Rancho 5000. For those of you that aren't familiar with Rod Hall, he's a Baja racing legend, sort of. He's competed in every single Baja 1000 since 1967 or 68 and in the last few years he was competing against a team I work with. It was somewhat ironic to find these, but the white paint has got to go, and so will the stickers. Sorry Rod.   Continuing on, add master cylinder, and some pedals. Look! on the battery tray, a calibrated breaker bar! 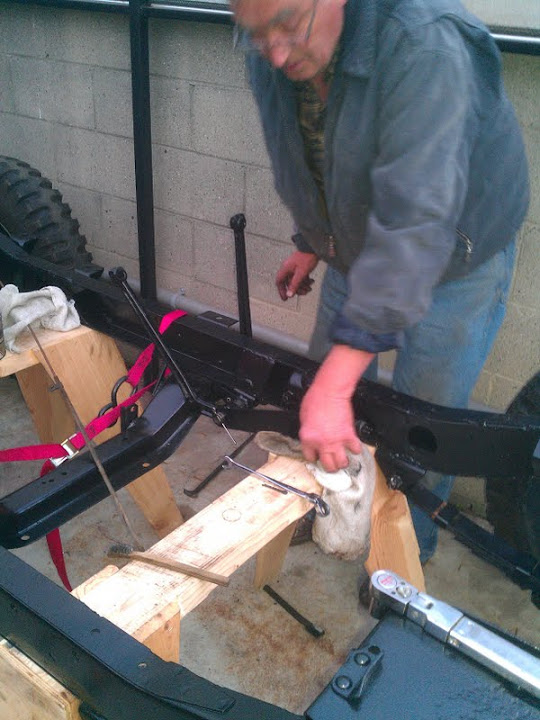 To eliminate the brake pulling I mentioned earlier, I decided to fabricate all new hard and soft brake lines. Some plumbing pictures for your pleasure:   Here you see me practicing the double flare technique. I didn't like it so I cut that off then re-flare. The 2nd time around, i put the nut on before flaring... 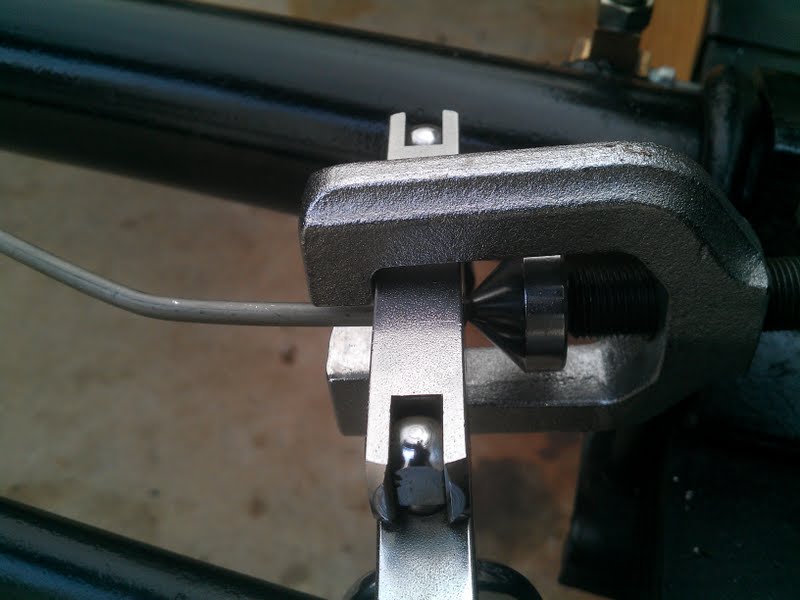 Right rear  Right front 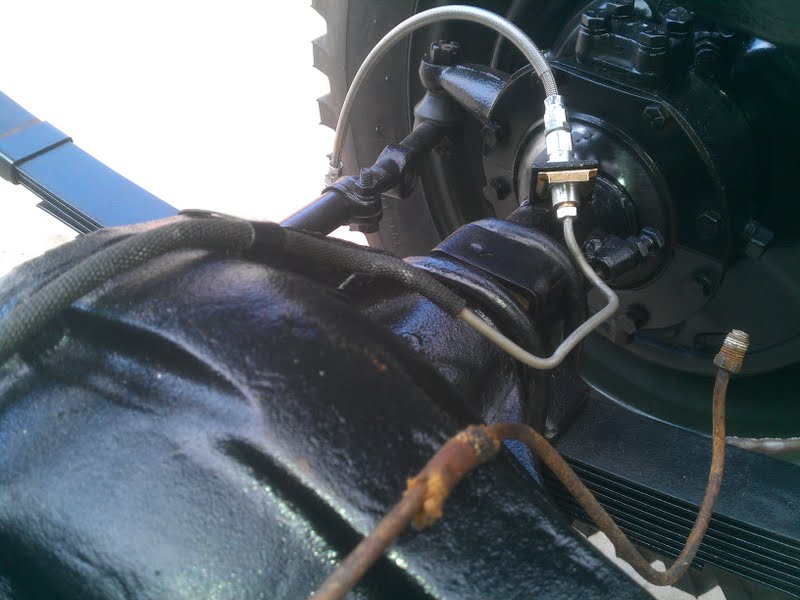 Left rear 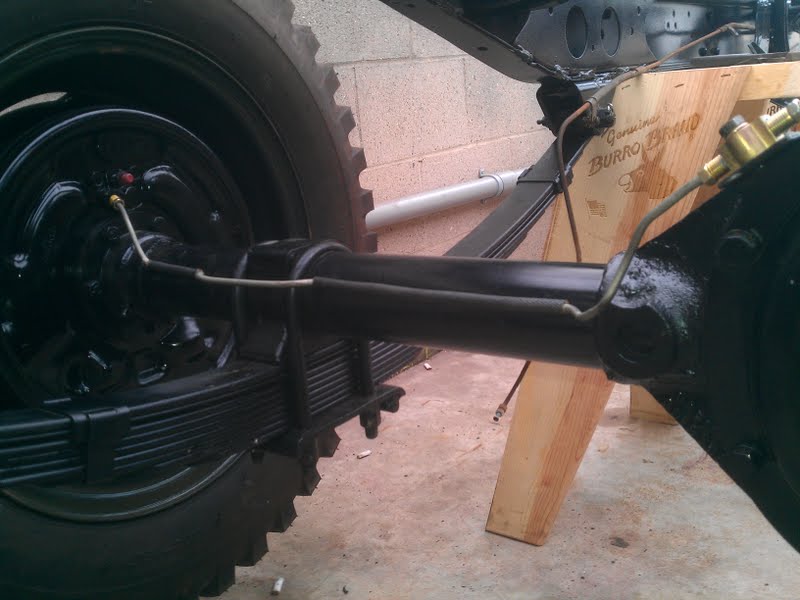 and finally the long line to the back. for this I needed 64" of tube but I didn't realize this until all other lines were done. I bought a couple of 3, 4 and 5 foot sections to do everything, thinking the 5 footer is long enough. Now I'm faced with coupling 2 lines together or buying a 25 foot roll Since 5 is the longest premade length available. couplings = chance for leaks so I bought a 25 foot roll and now I have 19 feet and some odd inches left for the next project. If you're going to do his, buy the roll and the tube nuts and go to town.  v Edited by hooptytank - 13 Feb. 2012 at 9:56am |
|
|
|
|
hooptytank
Member
Joined: 12 Feb. 2012 Location: Santa Monica,CA Status: Offline Points: 22 |
Post Options
Thanks(0)
Quote Reply
Posted: 13 Feb. 2012 at 7:17am |
|
With the engine assembled I put the clutch and pressure plate on, so I could assemble the trans.
 Trans assembled ready to bolt on  Bellhousing had a nasty crack that I had a buddy with voodoo cast iron welding skills zap up for me. He bolted it to a flat table, to keep it from warping, put the whole thing in an oven, used some high nickel content rod and went to town. Time will tell if this worked. Wonder why it cracked in the 1st place, only thing I noticed was that only 1 bolt was holding the inspection cover on. maybe that cover becomes a structural member when bolted down?  The mysterious dowel bolts.  used some white paint to make the markings stand out better. Keep in mind that the flywheel can be mounted in 2 positions, but only one is right, or your markings will be 180 degrees off. http://www.cj-2a.com/oldsite/techtips/alignmarks/index.html  Bellhousing and starter mounted. at this point you're probably wondering why the head is not on. I'm waiting for some ARP head studs to arrive. are they needed? NO. Do they look sweet and cost me the same as the replacement studs from India? heck YES  put some "Right Stuff" around the bolts that I believe will give me problems as well as the cluster shaft. The throw out pivot has Moly lube on it  Trans bolted on  T-case bolted on. Out of the 5 bolts, there's a short bolt that needs to go by the reverse idler or you'll have problems. Bolted on the input gear, cover on, and ready to go. Pops and the dog supervising the operation  Studs finally arrived, the head is back from surfacing(it was way worse than the deck) covered the recycled soda can box in copper gasket sealer (along with the valves and bores). 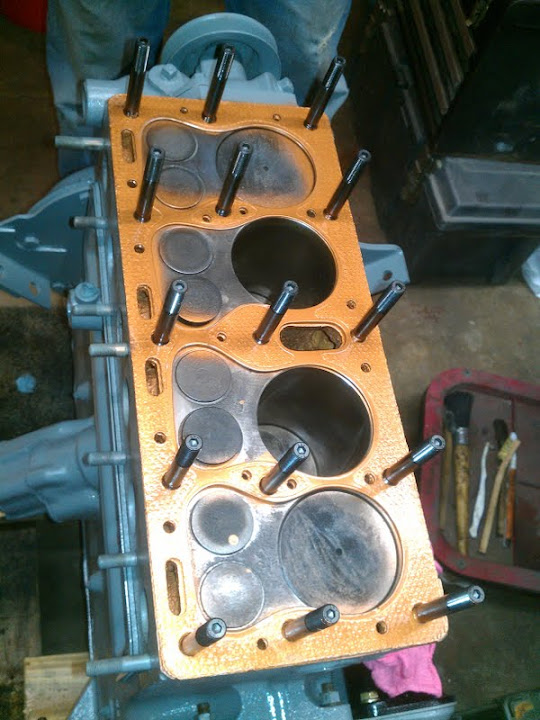 head torqued on. Look at those sexy nuts  prepping the mounts: the old mounts had a metal plate tack welded to them, the new ones did not. I believe the old mounts to be original, so I cut those plates off and attached them to the new mounts   All I need to do now is drop it on the chassis. The chassis, coming up next. v |
|
|
|
|
Post Reply
|
Page 12> |
| Tweet |
| Forum Jump | Forum Permissions You cannot post new topics in this forum You cannot reply to topics in this forum You cannot delete your posts in this forum You cannot edit your posts in this forum You cannot create polls in this forum You cannot vote in polls in this forum |


 Topic Options
 Oilleaker1 wrote: